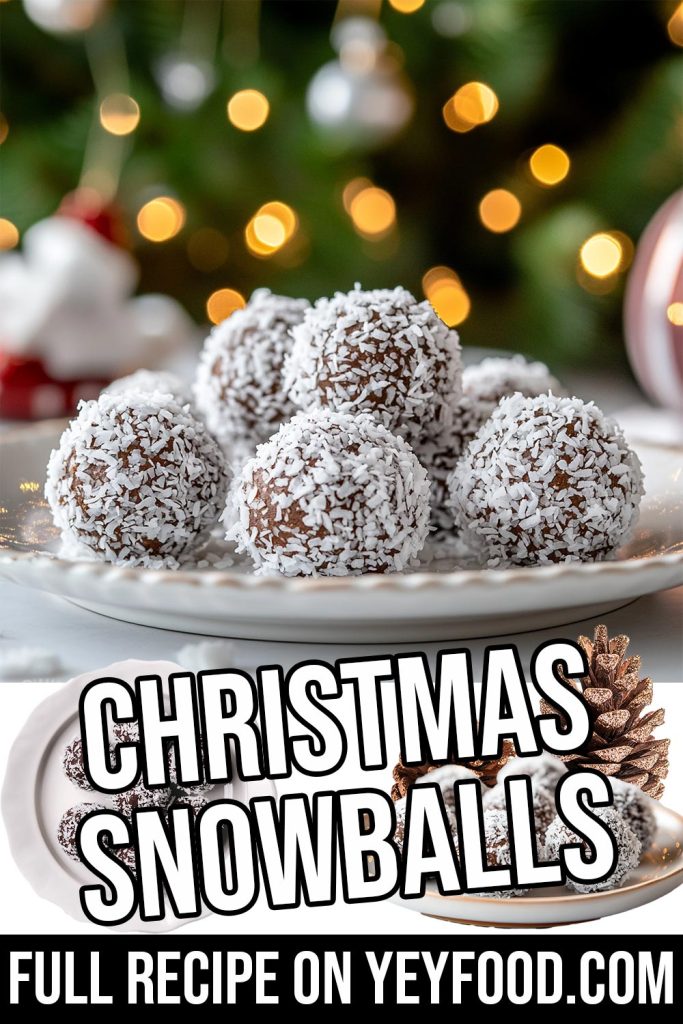
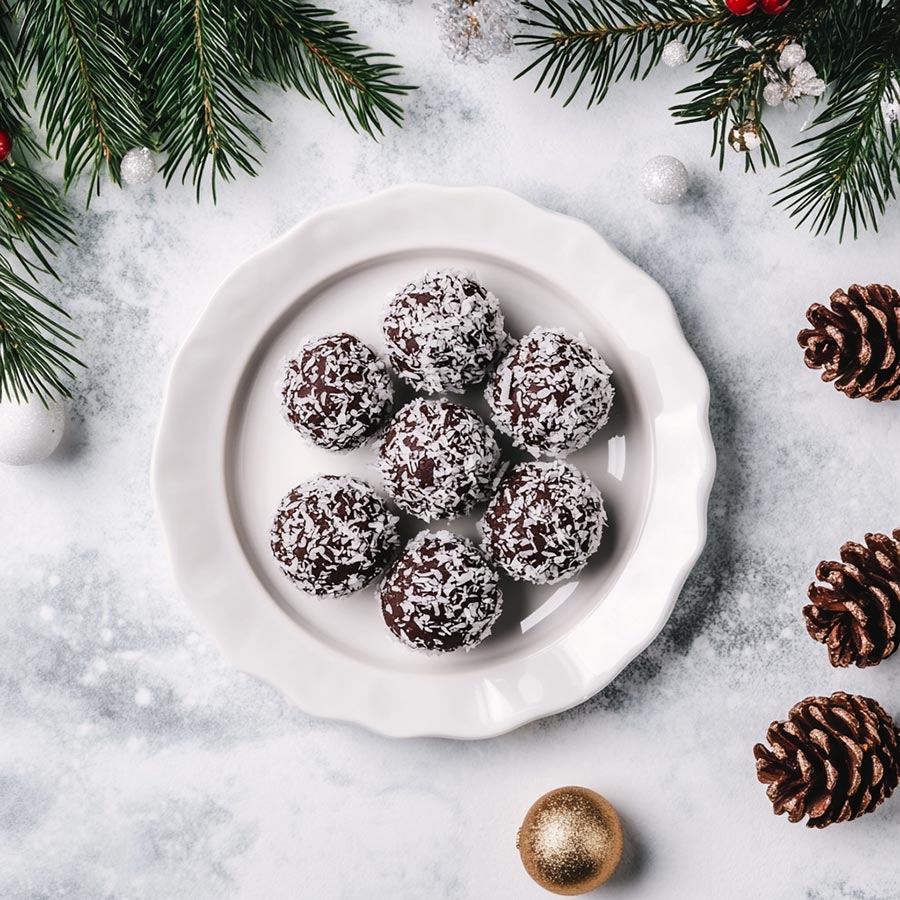
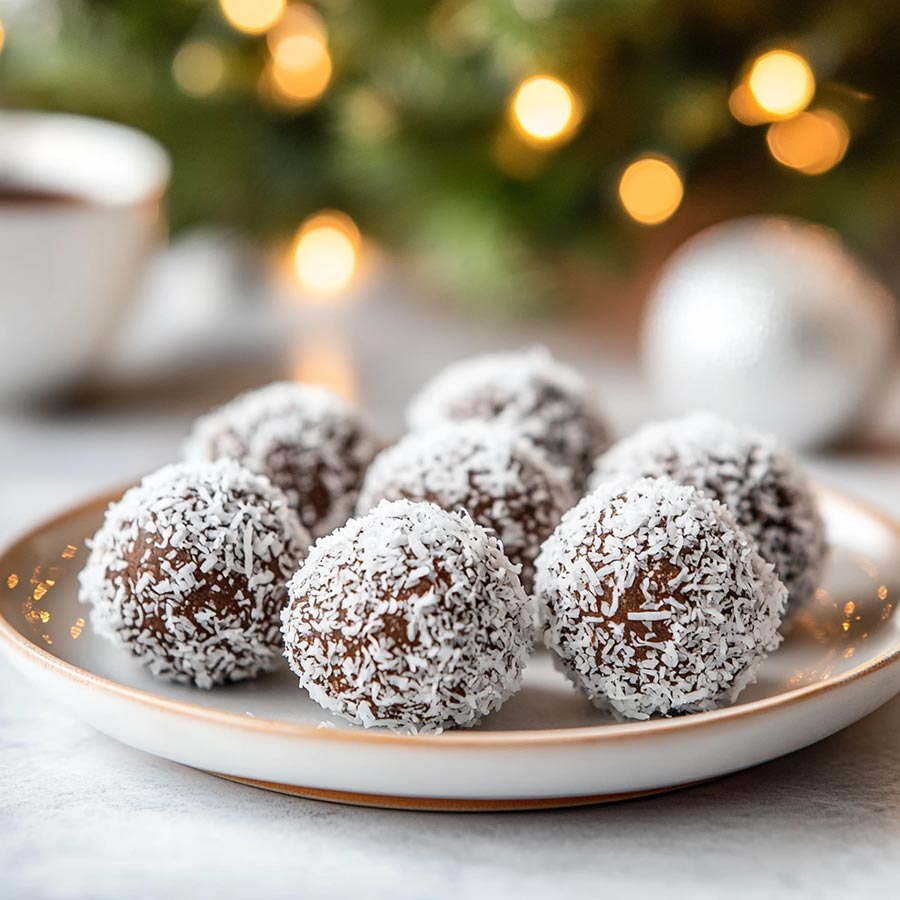
Christmas Snowballs

Christmas is a time for celebration, family, and of course, delicious treats. One such indulgence that perfectly captures the spirit of the season is the classic Christmas Chocolate Snowball Truffle. These delightful treats, coated in a fluffy layer of coconut, are a must-have for any holiday gathering.
Making your own Christmas Chocolate Snowball Truffles is surprisingly easy and allows you to customize the flavor and ingredients to your liking. The rich chocolate filling, combined with the sweet and crunchy coconut exterior, creates a truly irresistible combination.
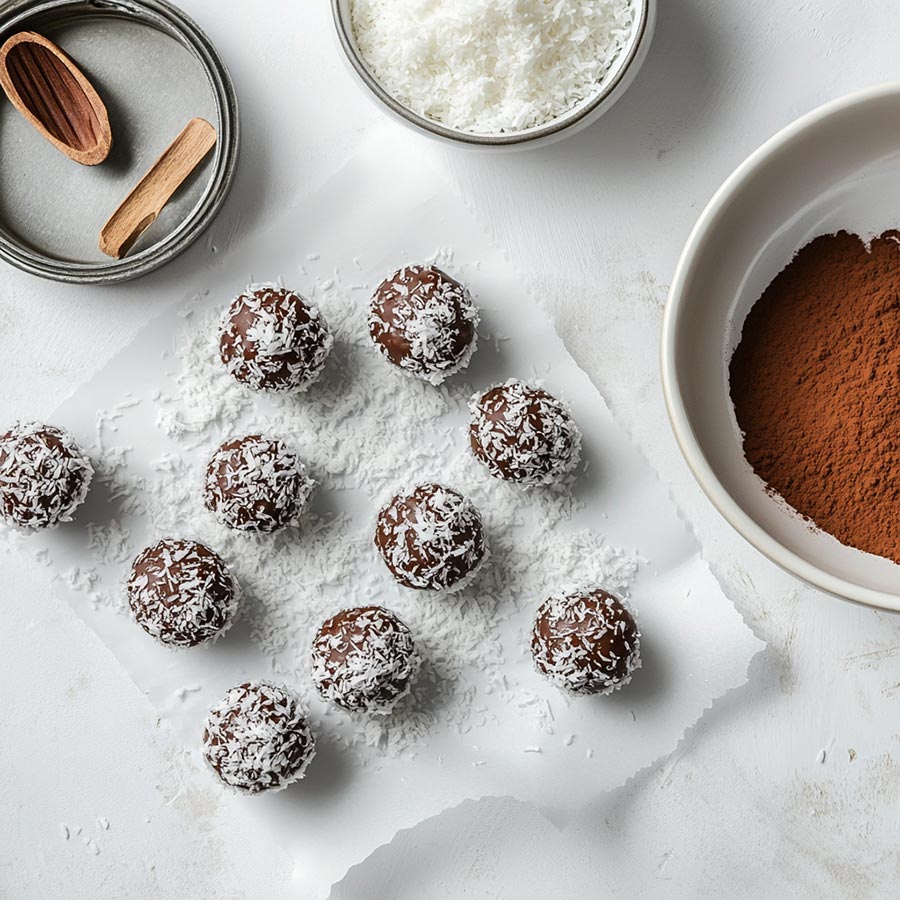
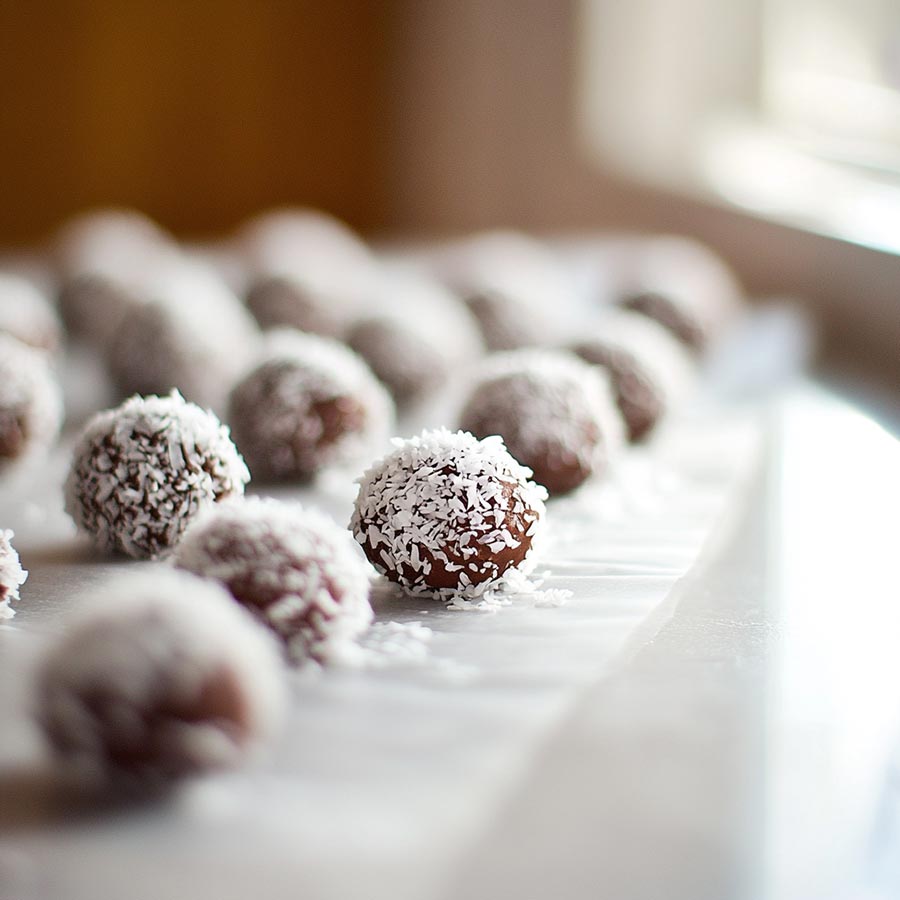
To get started, begin by melting semi-sweet chocolate chips, heavy cream, and softened butter together. Once melted, stir in vanilla extract for a touch of warmth. Pour the mixture into a shallow dish and chill in the refrigerator until firm. Scoop out small portions of the chilled chocolate and roll them into balls. Finally, coat each truffle in dessicated coconut.
For a more festive touch, consider adding a pinch of ground cinnamon or nutmeg to the chocolate mixture. You can also experiment with different types of chocolate, such as milk or dark chocolate, to suit your taste preferences.
Once you’ve finished making your truffles, store them in an airtight container in the refrigerator for up to 3 days. Serve them as a sweet treat after dinner or as a festive addition to your holiday dessert table.
Indulge in the magic of Christmas with these homemade Chocolate Snowball Truffles. Not only are they delicious, but they also make a wonderful gift for friends and family. So gather your ingredients and get baking!
Questions I often get asked about this recipe:
Can I use a different type of chocolate?
Absolutely! You can experiment with different types of chocolate, such as milk or dark chocolate, to suit your taste preferences.
How long should I chill the chocolate mixture before shaping the truffles?
It’s important to chill the chocolate mixture for at least 2 hours, or until firm, before shaping the truffles. This will ensure that they hold their shape and don’t become too soft.
Can I make these truffles ahead of time?
Yes, you can make these truffles ahead of time and store them in an airtight container in the refrigerator for up to 3 days.
How can I make these truffles gluten-free?
To make these truffles gluten-free, ensure that the chocolate chips and coconut you use are gluten-free.
What can I use as a substitute for dessicated coconut?
While dessicated coconut is a classic coating for these truffles, you could also use crushed nuts, cocoa powder, or finely chopped chocolate chips as a substitute.
Can I add other ingredients to the chocolate mixture?
Yes, you can add other ingredients to the chocolate mixture, such as a pinch of ground cinnamon, nutmeg, or a teaspoon of instant coffee for a more complex flavor.
How can I store these truffles?
Store the truffles in an airtight container in the refrigerator for up to 3 days.
What you need to make Christmas Snowballs:
1 cup (140g) semi-sweet chocolate chips
1/2 cup (113g) heavy cream
1/4 cup (56g) unsalted butter, softened
1 teaspoon vanilla extract
1 cup (140g) dessicated coconut
How to make it:
Prepare the chocolate mixture: In a microwave-safe bowl, combine the chocolate chips, heavy cream, and butter. Heat in 30-second intervals, stirring well after each, until melted and smooth. Stir in the vanilla extract.
Chill the mixture: Pour the melted chocolate mixture into a shallow dish and place it in the refrigerator for 2 hours, or until firm.
Shape the truffles: Scoop out small portions of the chilled chocolate mixture and roll them into balls.
Coat in coconut: Roll each truffle in the dessicated coconut until completely coated.
Chill and serve: Place the truffles on a plate and chill in the refrigerator for at least 30 minutes before serving.
Tips:
For a more festive touch, add a pinch of ground cinnamon or nutmeg to the chocolate mixture.
If the truffles are too soft to handle, chill them for a bit longer before rolling them in coconut.
Store the truffles in an airtight container in the refrigerator for up to 3 days.
Latest Reviews:
These Christmas Chocolate Snowball Truffles are a delightful treat! The rich chocolate flavor combined with the sweet coconut coating is a perfect match. They’re easy to make and look festive on any dessert table. Terry T.
I followed this recipe to a tee and the results were amazing. The truffles were perfectly soft and the coconut coating was just the right amount of crunch. They were a hit at our holiday gathering! Rich W.
I’ve tried several truffle recipes, but this one is by far the best. The truffles are decadent and the flavor is incredible. I’ll definitely be making these again next Christmas. Paula K.
Printable Recipe:
Before you print the recipe, could I ask you a favor? Please consider sharing this recipe on Facebook or pin to a group on Pinterest? This would really help us out. Thank you so much <3

Christmas Snowballs
Christmas Snowballs
Ingredients
- 1 cup (140g) semi-sweet chocolate chips
- 1/2 cup (113g) heavy cream
- 1/4 cup (56g) unsalted butter, softened
- 1 teaspoon vanilla extract
- 1 cup (140g) dessicated coconut
Instructions
- Prepare the chocolate mixture: In a microwave-safe bowl, combine the chocolate chips, heavy cream, and butter. Heat in 30-second intervals, stirring well after each, until melted and smooth. Stir in the vanilla extract.
- Chill the mixture: Pour the melted chocolate mixture into a shallow dish and place it in the refrigerator for 2 hours, or until firm.
- Shape the truffles: Scoop out small portions of the chilled chocolate mixture and roll them into balls.
- Coat in coconut: Roll each truffle in the dessicated coconut until completely coated.
- Chill and serve: Place the truffles on a plate and chill in the refrigerator for at least 30 minutes before serving.
If you enjoyed this recipe, please share it on your social media! I would love for more people to try this delicious and easy-to-make recipe. If you have any questions or feedback, please feel free to leave a comment below. I would love to hear from you! Shhh… Join our secret foodie group on Facebook
Pumpkin Streusel Cheesecake
No-Bake Pumpkin Fudge
Baked Pumpkin Crisp