Classic Cherry Delight

There’s something magical about a recipe that brings the family together, and for us, this Cherry Delight is that recipe. It all started one summer evening when I wanted to create something quick, indulgent, and memorable for a family dinner. The moment I brought this dessert to the table, the room lit up with smiles, and by the end of the night, not a crumb was left in the dish.
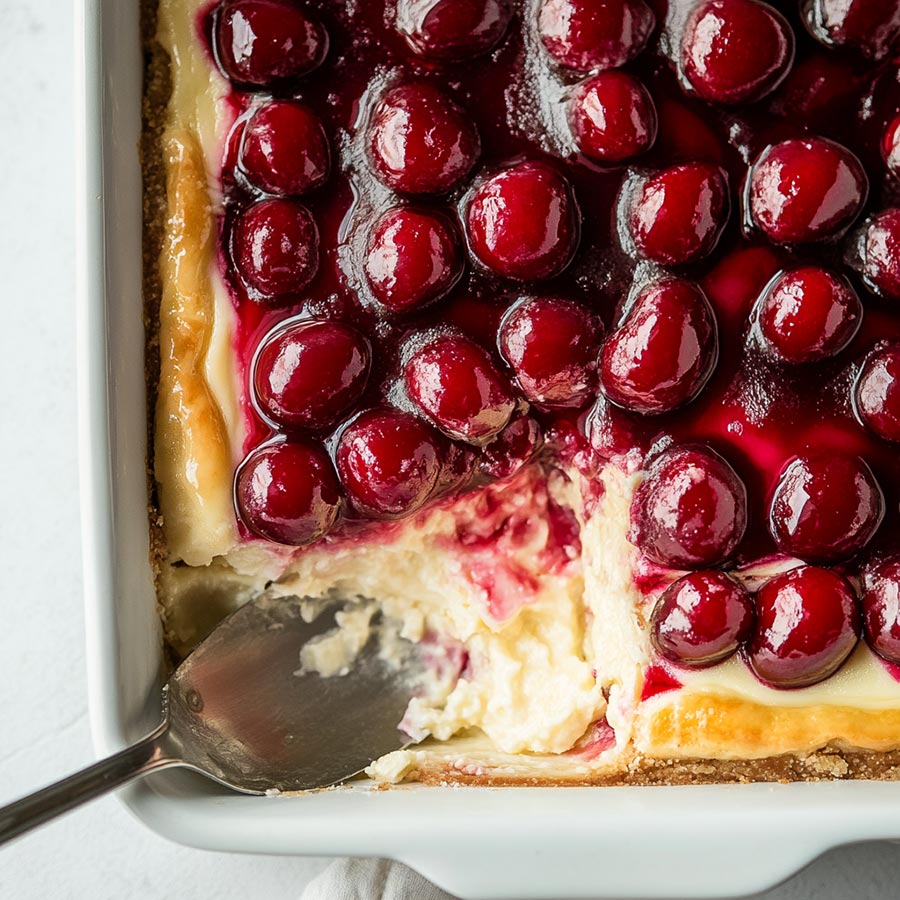
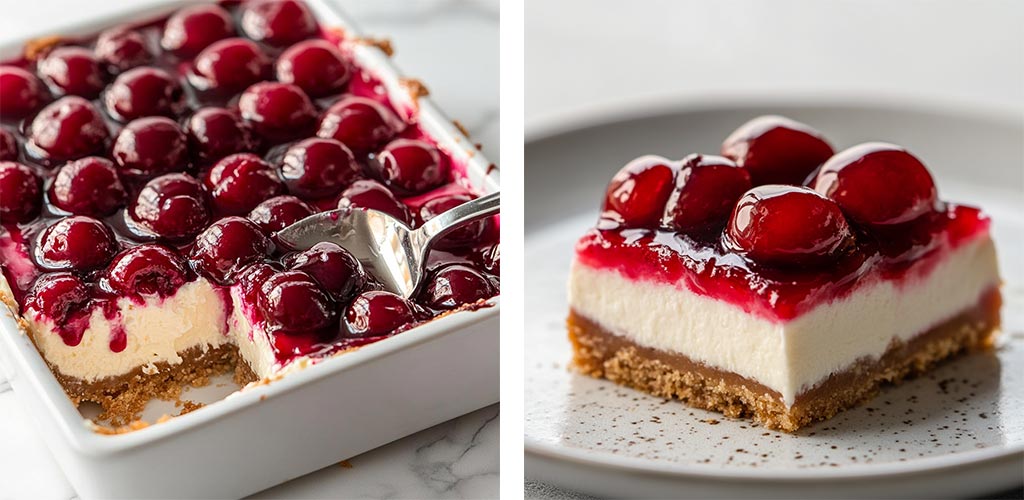
What makes this dessert so special? For me, it’s the balance of flavors and textures: a buttery graham cracker crust, a creamy and tangy cheesecake filling, and the crowning glory, a luscious cherry topping. It’s simple yet sophisticated, the kind of recipe that feels both nostalgic and modern.
I also love how adaptable this dish is. Need a quick dessert for a potluck? Cherry Delight has your back. Want to impress dinner guests with minimal effort? This recipe works every time. And let’s not forget the best part: it’s a no-bake dessert, making it perfect for those busy days when you still want something homemade.
If you’re like me, a busy mom juggling a million tasks, you’ll appreciate how easily this recipe comes together. You don’t need fancy ingredients or specialized equipment. Just a little bit of time and a lot of love. And trust me, the payoff is so worth it, the look of delight on your family’s faces will make this recipe an instant classic in your household, just like it is in mine.
Questions I Often Get Asked About This Recipe:
Can I use a different fruit topping?
Absolutely! Blueberries, strawberries, or even a mix of berries work beautifully. Just make sure to use a pie filling or jam-like consistency for the topping.
Do I have to use graham crackers for the crust?
Not at all. You can substitute graham crackers with digestive biscuits, shortbread cookies, or even a chocolate cookie base for a twist.
Can this be made ahead of time?
Yes! In fact, Cherry Delight tastes even better when made the day before, as the flavors have more time to meld together.
What if I don’t have a stand mixer?
No problem! A handheld electric mixer works just fine to whip up the creamy filling.
Can I make this gluten-free?
Yes, just use gluten-free graham crackers for the crust, and you’re all set.
What You Need to Make Cherry Delight:

Ingredients for the Crust:
7 tablespoons unsalted butter, melted
1 ½ cups graham cracker crumbs (about 9 whole crackers)
3 tablespoons granulated sugar
Ingredients for the Filling:
8 ounces cream cheese, softened
1 cup powdered sugar
1 teaspoon vanilla extract
8 ounces whipped topping (like Cool Whip), thawed
Ingredients for the Topping:
1 can (21 ounces) cherry pie filling
Tools You’ll Need:
9×9-inch baking dish
Mixing bowls
Electric mixer or handheld whisk
Spatula
How to Make Cherry Delight:

Prepare the Crust: Combine graham cracker crumbs, melted butter, and sugar in a bowl. Mix until evenly coated, then press the mixture firmly into the bottom of your baking dish. Refrigerate for at least 30 minutes to set.
Make the Filling: In a mixing bowl, beat the softened cream cheese until smooth. Gradually add the powdered sugar and vanilla extract, mixing until creamy. Fold in the whipped topping gently until fully combined.
Assemble the Layers: Spread the cream cheese filling evenly over the chilled crust. Smooth the top with a spatula.
Add the Cherry Topping: Spoon the cherry pie filling evenly over the cream cheese layer. Cover and refrigerate for at least 4 hours, or overnight, for the best results.
Serve and Enjoy: Slice into squares and serve chilled. Watch the smiles appear!
Tips for Making the Best Cherry Delight:

Chill the crust: Let the crust chill for at least 30 minutes to ensure it stays firm when adding the filling.
Use full-fat cream cheese: This gives the filling its rich, creamy texture. Low-fat options can make it runny.
Customize the topping: Experiment with other pie fillings like blueberry or peach for variety.
Freeze for a firmer texture: If you prefer a firmer consistency, pop it in the freezer for an hour before serving.
Make it your own: Add a sprinkle of chopped nuts or shaved chocolate on top for extra flavor and visual appeal.
Latest Reviews:

⭐️⭐️⭐️⭐️⭐️ “This recipe was a hit at our family barbecue! So easy to make and everyone loved it.”
⭐️⭐️⭐️⭐️⭐️ “Perfect for busy moms like me. Made it the night before and it tasted amazing the next day!”
⭐️⭐️⭐️⭐️ “Really good, but I think I’ll try a chocolate crust next time for a twist.”
⭐️⭐️⭐️⭐️⭐️“My kids couldn’t get enough of this! It’s officially our new favorite dessert.”
⭐️⭐️⭐️⭐️ “Tasty and simple, but I might add a bit more cream cheese for a tangier flavor next time.”
Printable Recipe:
Before you print the recipe, could I ask you a favor? Please consider sharing this recipe on Facebook or pin to a group on Pinterest? This would really help us out. Thank you so much <3

Classic Cherry Delight
Indulge in the ultimate no-bake dessert, Cherry Delight! With its buttery crust, creamy filling, and sweet cherry topping, this easy recipe is perfect for busy moms and guaranteed to delight your family.
Ingredients
- Ingredients for the Crust:
- 7 tablespoons unsalted butter, melted
- 1 ½ cups graham cracker crumbs (about 9 whole crackers)
- 3 tablespoons granulated sugar
- Ingredients for the Filling:
- 8 ounces cream cheese, softened
- 1 cup powdered sugar
- 1 teaspoon vanilla extract
- 8 ounces whipped topping (like Cool Whip), thawed
- Ingredients for the Topping:
- 1 can (21 ounces) cherry pie filling
- Tools You’ll Need:
- 9x9-inch baking dish
- Mixing bowls
- Electric mixer or handheld whisk
- Spatula
Instructions
- Prepare the Crust: Combine graham cracker crumbs, melted butter, and sugar in a bowl. Mix until evenly coated, then press the mixture firmly into the bottom of your baking dish. Refrigerate for at least 30 minutes to set.
- Make the Filling: In a mixing bowl, beat the softened cream cheese until smooth. Gradually add the powdered sugar and vanilla extract, mixing until creamy. Fold in the whipped topping gently until fully combined.
- Assemble the Layers: Spread the cream cheese filling evenly over the chilled crust. Smooth the top with a spatula.
- Add the Cherry Topping: Spoon the cherry pie filling evenly over the cream cheese layer. Cover and refrigerate for at least 4 hours, or overnight, for the best results.
- Serve and Enjoy: Slice into squares and serve chilled. Watch the smiles appear!
If you enjoyed this recipe, please share it on your social media! I would love for more people to try this delicious and easy-to-make recipe. If you have any questions or feedback, please feel free to leave a comment below. I would love to hear from you! Shhh… Join our secret foodie group on Facebook
Crockpot White Russians
Crockpot Meatballs In Onion Gravy
Crockpot Apple Cider
