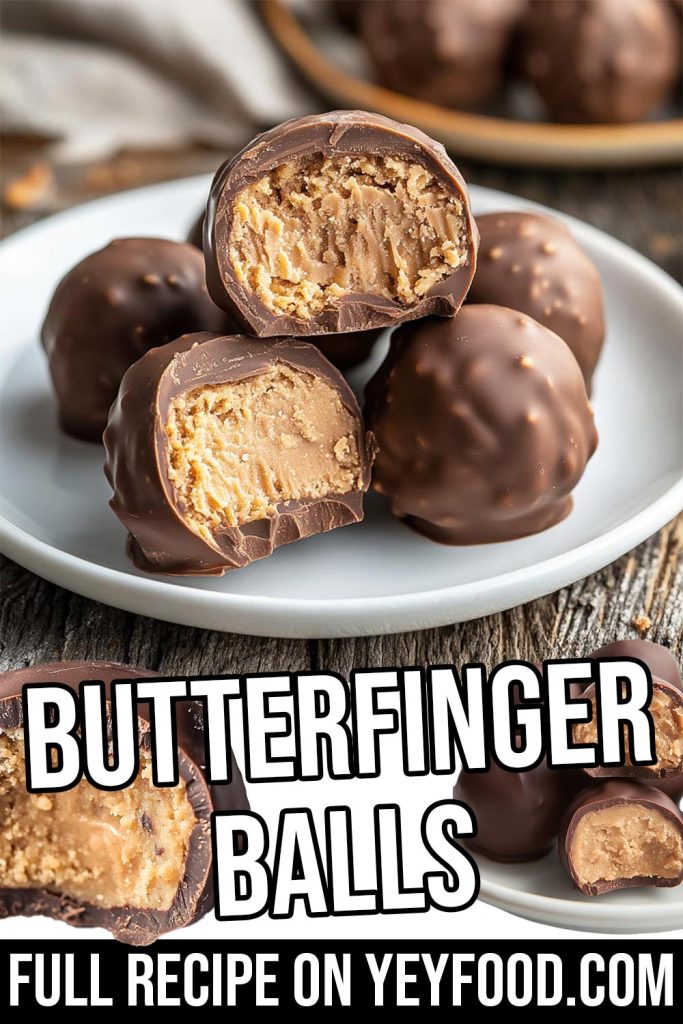
Butterfinger Balls
Some recipes just have a way of becoming instant classics in your home, and these Butterfinger Balls are exactly that. The first time I made them was during a busy holiday season, when I was looking for something quick, easy, and kid-approved for a sweet treat. I had a couple of leftover Butterfinger candy bars from Halloween, and rather than letting them sit in the pantry, I decided to get a little creative. What happened next was pure magic.
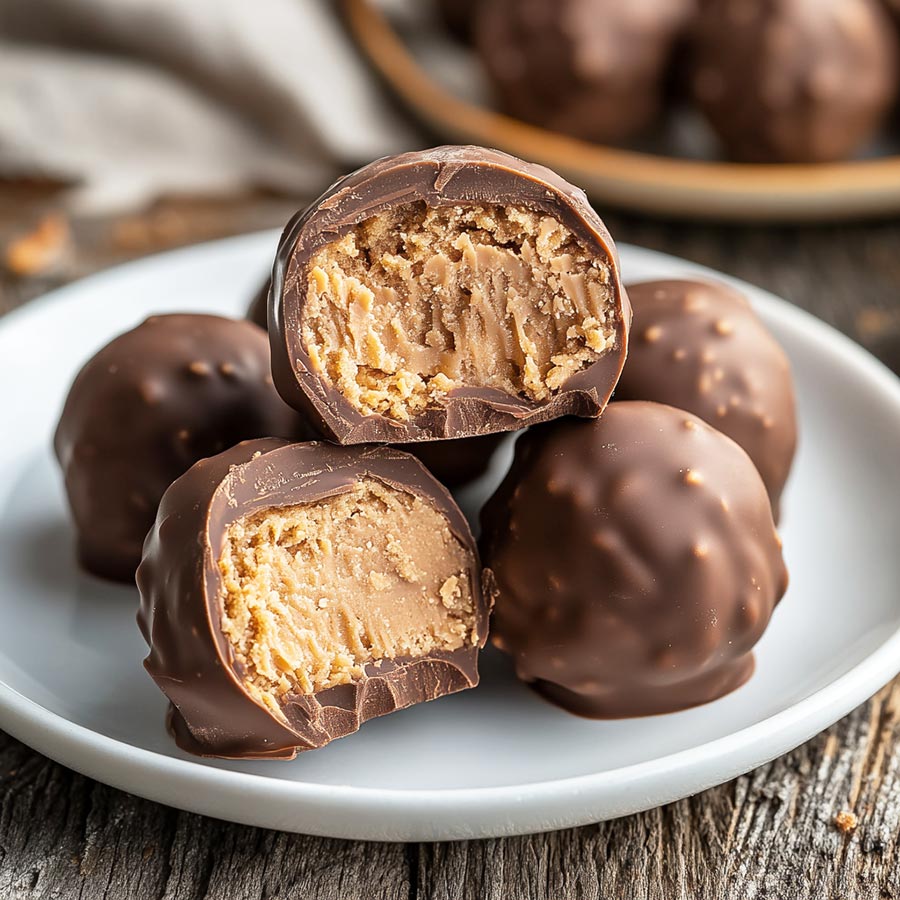
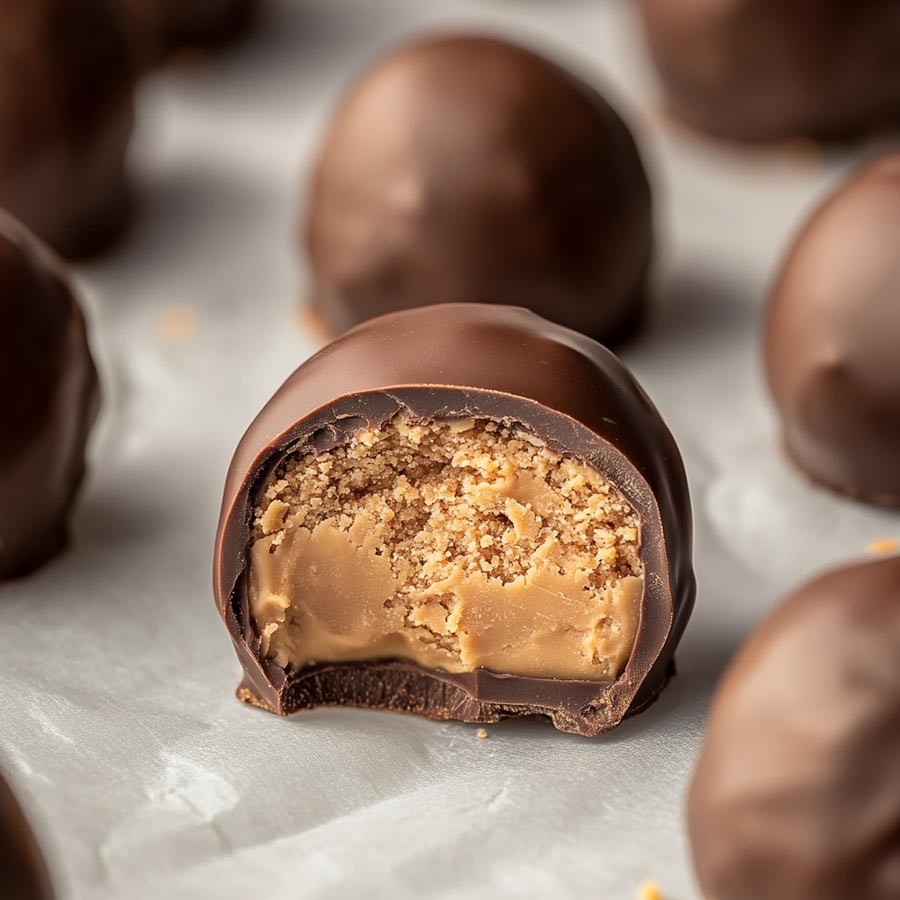
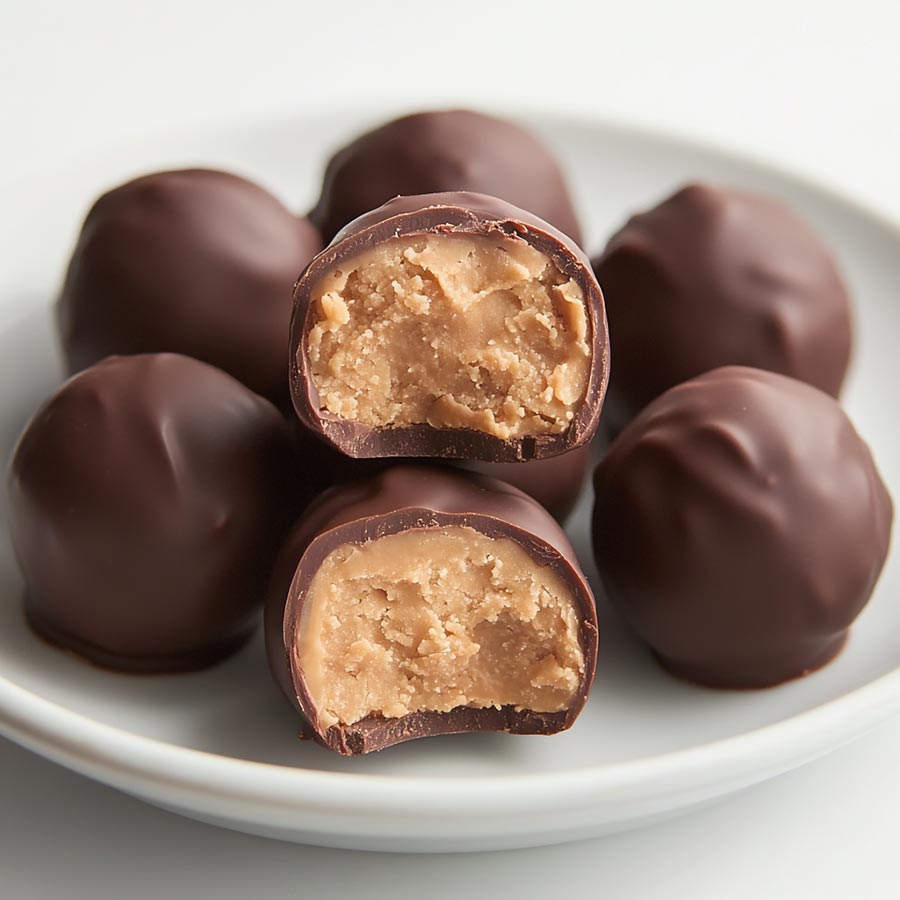
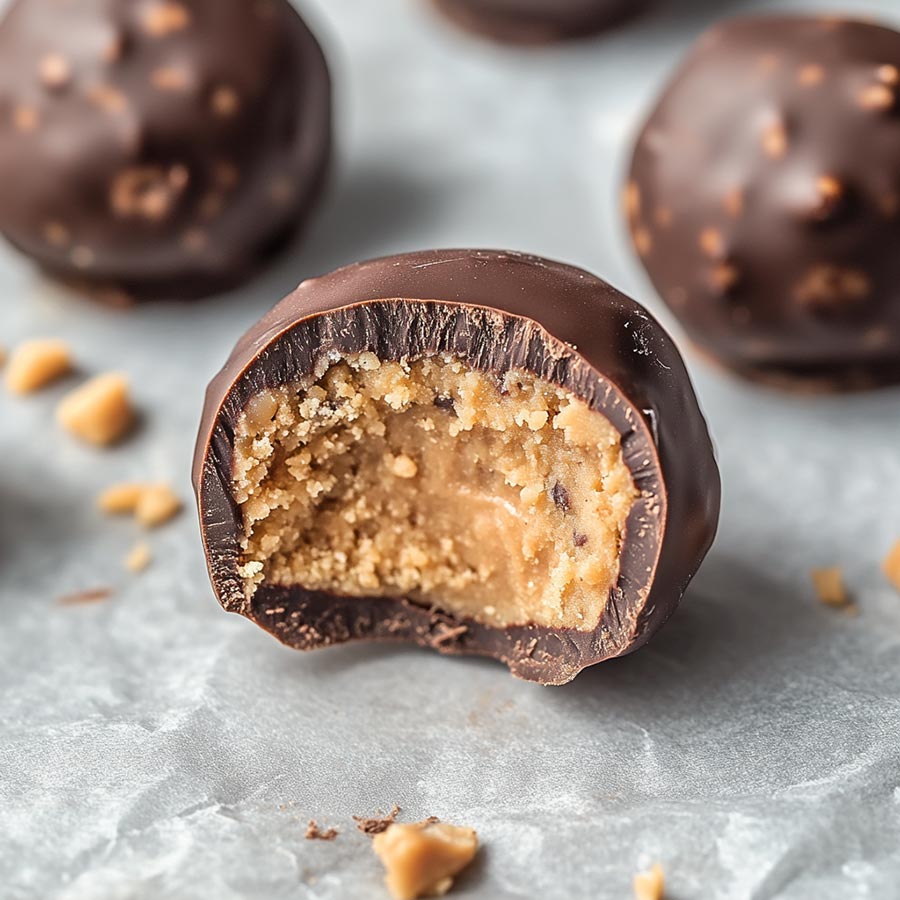
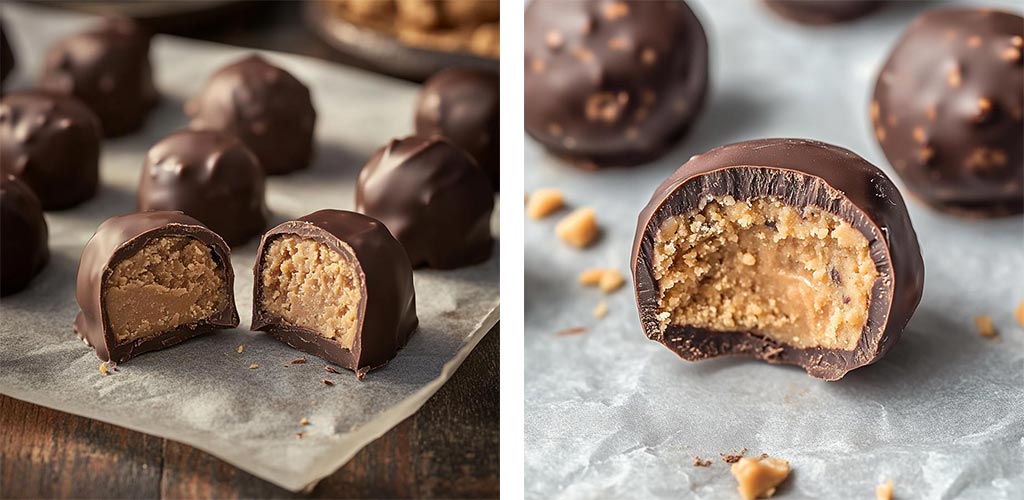
These little bites are everything you want in a treat, crispy, creamy, chocolatey, and so satisfying. They’re rich, but not overwhelming; sweet, but with that perfect peanut-buttery crunch. I knew they were a winner when my husband couldn’t stop sneaking them from the fridge, and my kids started requesting them by name. They even earned a spot in our annual Christmas cookie tray lineup, which is no small feat!
What I love most about Butterfinger Balls is how little time they take to make. As a stay-at-home mom juggling snacks, schedules, and sticky fingers, I appreciate recipes that are both indulgent and efficient. These come together in under 30 minutes with just a handful of ingredients and no baking required! They freeze beautifully, travel well, and are always the first thing to disappear at potlucks and parties.
So if you’re looking for a no-fuss dessert that feels special and delivers big-time flavor, these Butterfinger Balls are going to be your new favorite too.
Questions I Often Get Asked About This Recipe
Can I use other candy bars instead of Butterfingers?
Yes! Crunch bars, Reese’s, or even Twix can be great substitutions, but nothing beats that unique Butterfinger crunch.
Do these need to be refrigerated?
Yes, refrigerating helps them set and keeps them firm. You can also freeze them for longer storage.
Can I make them ahead of time?
Absolutely! Make them up to a week in advance and store them in an airtight container in the fridge.
Are they gluten-free?
Butterfingers are technically gluten-free, but always check the label. Also be mindful of your other ingredient choices to ensure they’re certified gluten-free.
Can kids help make this recipe?
Definitely! This is a fun, hands-on recipe that’s perfect for little helpers, just supervise during the chocolate melting step.
What You Need to Make Butterfinger Balls
Ingredients:
2 cups crushed Butterfinger candy bars (about 8 fun-size bars)
1 ½ cups creamy peanut butter
1 ½ cups powdered sugar
1 teaspoon vanilla extract
2 cups milk chocolate chips (or chocolate candy coating)
1 tablespoon coconut oil (optional, for smoother melting)
Tools Needed:
Mixing bowl
Rubber spatula
Baking sheet
Parchment or wax paper
Microwave-safe bowl (for melting chocolate)
Cookie scoop or tablespoon
How to Make Butterfinger Balls
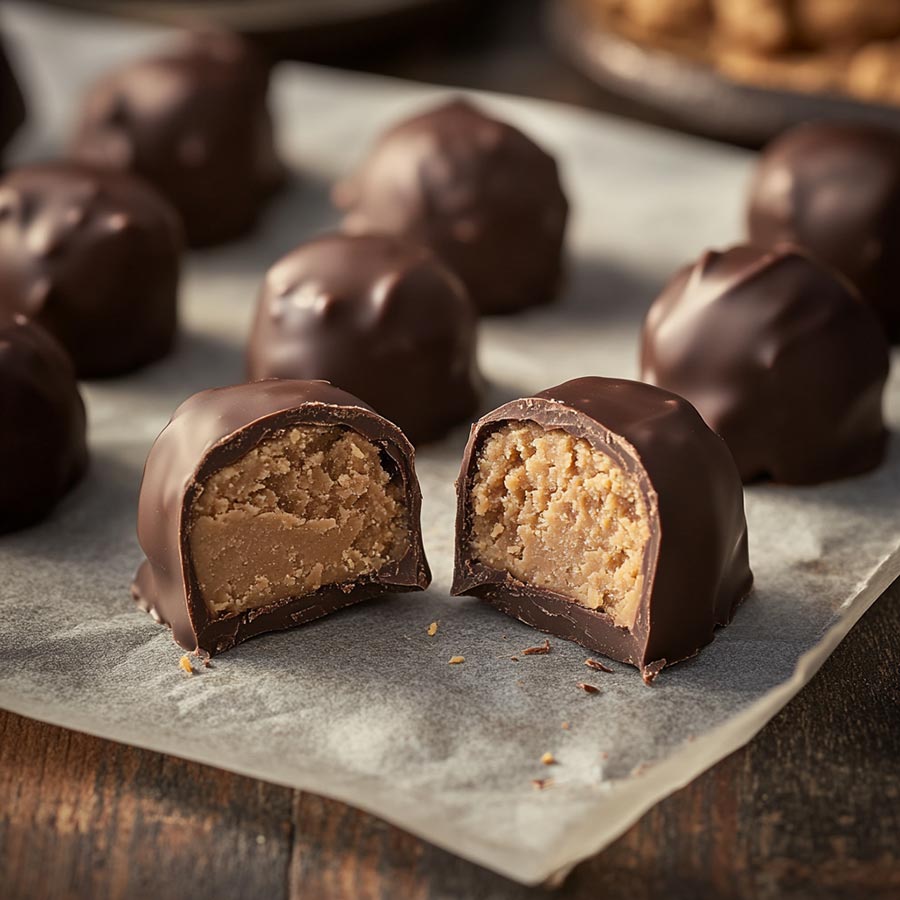
Prepare the mixture: In a large bowl, combine the crushed Butterfinger bars, creamy peanut butter, powdered sugar, and vanilla extract. Mix until a thick, uniform dough forms.
Form the balls: Use a cookie scoop or tablespoon to portion the dough. Roll into balls and place them on a parchment-lined baking sheet.
Chill: Place the balls in the refrigerator for about 20 minutes to firm up.
Melt the chocolate: In a microwave-safe bowl, melt the chocolate chips with the coconut oil (if using) in 30-second intervals, stirring until smooth.
Dip: Using a fork or toothpick, dip each chilled ball into the melted chocolate, making sure it’s fully coated. Let the excess drip off, then place it back on the lined baking sheet.
Set: Refrigerate the dipped balls for another 15–20 minutes or until the chocolate is completely set.
Serve or store: Enjoy immediately or transfer to an airtight container and keep refrigerated.
Tips for Making the Best Butterfinger Balls
Use room temperature peanut butter for easier mixing.
Crush the Butterfingers finely for a smoother texture, or leave a few chunks if you like a crunchier bite.
Chill the dough well before dipping in chocolate to prevent the balls from falling apart.
Add a pinch of salt if using unsalted peanut butter to enhance the flavor.
Freeze for longer storage: These freeze well for up to 3 months, just thaw in the fridge before serving.
Reader Reviews
⭐️⭐️⭐️⭐️⭐️ “These were a total hit at our family BBQ! Everyone kept asking for the recipe, so simple but SO good.” Sarah M.
⭐️⭐️⭐️⭐️ “Tasted amazing, but I had trouble with the chocolate being too thick. Next time I’ll try adding coconut oil for a smoother dip.” Tina R.
⭐️⭐️⭐️⭐️⭐️ “Perfect for making with the kids! We had a blast rolling the balls and dipping them. Great bonding activity!” Megan L.
⭐️⭐️⭐️⭐️⭐️ “I made a double batch and froze half they’re even better cold! Definitely going in my holiday rotation.” Jess T.
⭐️⭐️⭐️⭐️ “Yummy and easy! I might try using dark chocolate next time for a richer flavor.” Emily C.
Printable Recipe
Before you print the recipe, could I ask you a favor? Please consider sharing this recipe on Facebook or pin to a group on Pinterest? This would really help us out. Thank you so much <3

Butterfinger Balls
These no-bake Butterfinger Balls are the ultimate quick treat for busy days and sweet cravings! Made with crushed Butterfinger candy bars, peanut butter, and a smooth chocolate coating, they’re creamy, crunchy, and totally irresistible. Perfect for potlucks, parties, or a fun afternoon activity with kids!
Ingredients
- 2 cups crushed Butterfinger candy bars (about 8 fun-size bars)
- 1 ½ cups creamy peanut butter
- 1 ½ cups powdered sugar
- 1 teaspoon vanilla extract
- 2 cups milk chocolate chips (or chocolate candy coating)
- 1 tablespoon coconut oil (optional, for smoother melting)
- Tools Needed:
- Mixing bowl
- Rubber spatula
- Baking sheet
- Parchment or wax paper
- Microwave-safe bowl (for melting chocolate)
- Cookie scoop or tablespoon
Instructions
- Prepare the mixture: In a large bowl, combine the crushed Butterfinger bars, creamy peanut butter, powdered sugar, and vanilla extract. Mix until a thick, uniform dough forms.
- Form the balls: Use a cookie scoop or tablespoon to portion the dough. Roll into balls and place them on a parchment-lined baking sheet.
- Chill: Place the balls in the refrigerator for about 20 minutes to firm up.
- Melt the chocolate: In a microwave-safe bowl, melt the chocolate chips with the coconut oil (if using) in 30-second intervals, stirring until smooth.
- Dip: Using a fork or toothpick, dip each chilled ball into the melted chocolate, making sure it’s fully coated. Let the excess drip off, then place it back on the lined baking sheet.
- Set: Refrigerate the dipped balls for another 15–20 minutes or until the chocolate is completely set.
- Serve or store: Enjoy immediately or transfer to an airtight container and keep refrigerated.
If you enjoyed this recipe, please share it on your social media! I would love for more people to try this delicious and easy-to-make recipe. If you have any questions or feedback, please feel free to leave a comment below. I would love to hear from you! Shhh… Join our secret foodie group on Facebook
Crockpot White Russians
Crockpot Meatballs In Onion Gravy
Crockpot Apple Cider