With Easy Overnight Refrigerator Crust Recipe
We love thin crust pizza! Our favorite pizza always has a light and crisp crust. Why? Because we can eat more pieces of pizza without feeling stuffed! I was thrilled to find a do-ahead recipe for a yeast dough that makes a thin crust.
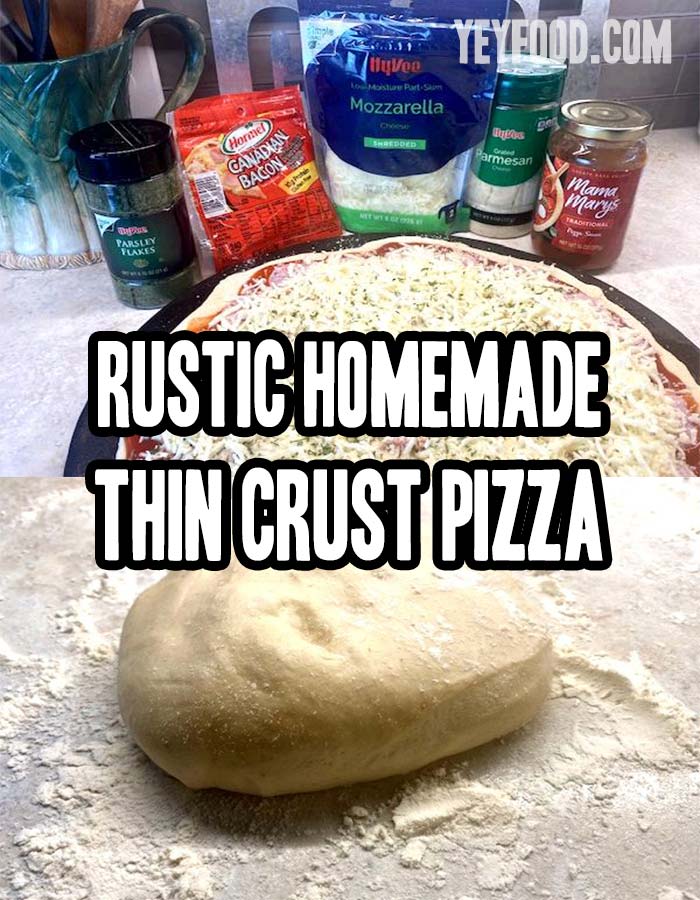
This easy recipe uses a small amount of yeast, bread flour, ice-cold water, and olive oil. Before you go to bed, mix up a batch, wrap it in plastic film or put it in a zipper storage bag and refrigerate it overnight while it rises slowly. This process creates a terrific, flavorful dough that is enough for three fourteen-inch pizzas.
You can store the dough in the refrigerator for three or four days! Take out what you need and bake a fresh pizza every night if you want! With a little help, the kids can make individual mini pizzas in the air fryer for lunch!
Make Crisp Delicious Thin Crust Pizza Crust It’s Simple As 1-2-3
Easy Overnight Thin Crust Pizza Dough
If you love thin crust pizza, you will love this recipe for dough you can keep in the refrigerator for three or four days and bake as needed.
Ingredients
- 4 1/2 cups bread flour
- 1 1/2 tsp salt
- 1 tsp yeast
- 1 3/4 cup very cold water
- 1/4 cup olive oil
Instructions
- Combine flour, salt, and yeast in a mixing bowl.
- Add the water in increments, stirring between each addition.
- Add the olive oil and stir to combine.
- Knead until supple.
- Put in a plastic bag and refrigerate for several hours or overnight.
- Take out the dough as needed and allow the dough to come to room temperature.
- Stretch to fit the pizza pan or stone using your hands.
- Add desired toppings and bake at 425 degrees for about twelve minutes or until desired shade of brown.
Notes
It is easier to make the dough using a stand mixer and dough hook.
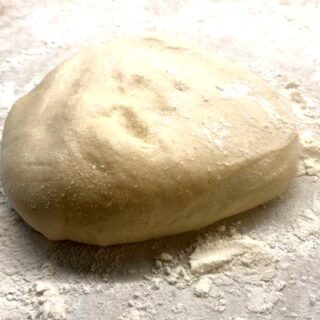
With its higher gluten content, bread flour works best for this crust, but you can use all-purpose flour. Combine flour, salt, and yeast in a mixing bowl. Add the very cold water in increments, stirring in between, until all the flour is evenly moistened. Cold water retards the yeast, so the rise is slow and produces the wonderful texture of the thin crust pizza.
Next, add the olive oil and stir to combine. Knead the dough until it’s supple. Put the dough in a plastic bag or zipper storage bag and refrigerate for several hours or overnight.
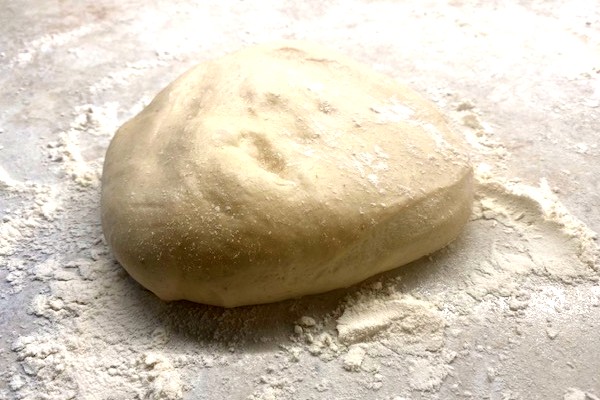
Take out the dough as needed and allow the dough to come to room temperature. Put the dough on the counter where you have sprinkled some corn meal or flour to keep it from sticking. Stretch it to fit the pizza pan or stone using your hands, not a rolling pin. A rolling pin can squish all the bubbles you want in the crust.
Add desired toppings and bake at 425 degrees for about twelve minutes or until desired shade of brown.
Top Your Yummy Thin Crust Pizza Any Way Your Heart Desires
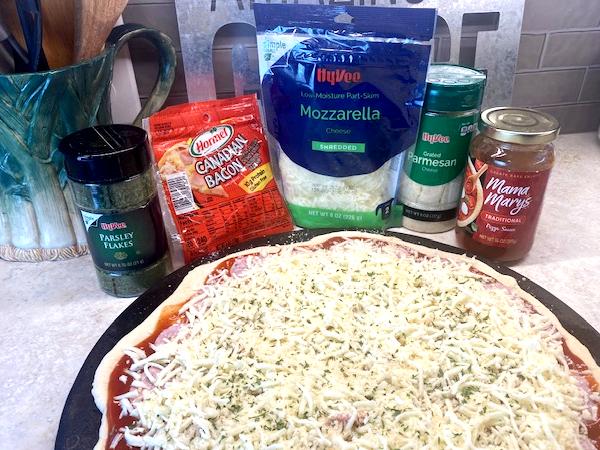
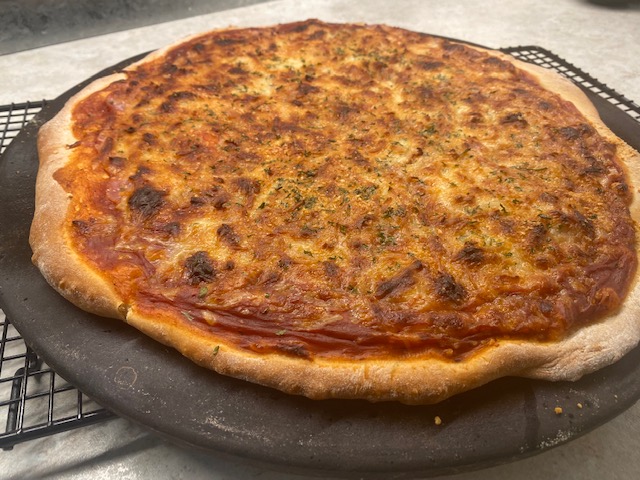
I was amazed at the variety of pizza sauces I found on the shelf, everything from super thrifty to fancy sauces with the name of famous chefs. There was alfredo and at least fifteen options for white and red sauces. It was a little mind-boggling! I liked Mama Mary’s pizza sauce; it was one in the mid-price range.
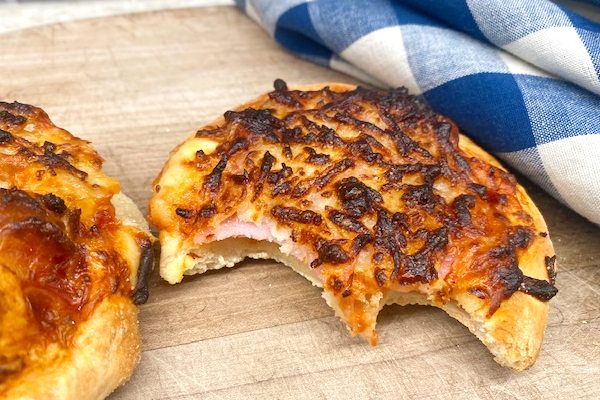
This time I made a middle-of-the-road thin crust pizza with red sauce, Canadian bacon, mozzarella, and parmesan cheese, with a sprinkle of parsley for a touch of green garnish. I used about a cup of sauce, 4 ounces of bite-size Canadian bacon, eight ounces of shredded mozzarella, and about one-fourth cup of grated Parmesan. One tablespoon of dried parsley provided the garnish.
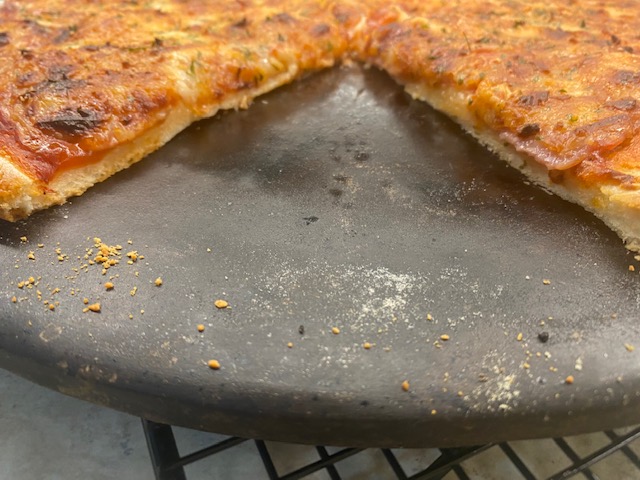
I baked it on my trusty old Pampered Chef Pizza Stone, which is now black from age and use. It looks like Pampered Chef has improved their already-wonderful pizza stone; you might want to check it out! They last forever! I love it!
Twelve minutes in a 425-degree oven later, we had an absolutely wonderful fourteen-inch thin crust pizza for dinner! I reheated the leftover slices in my air fryer for my husband’s lunch, and they were every bit as good as the night before.
Tonight, I’m getting more adventurous. I’m making a pickle and pepperoni pizza for our grandkids with this same yummy crust! I’ll report in a day or two. It turns out that pickle pizza is the darling of State Fair food stands this year, and we just have to try it! (Some say it’s a really “big dill!”) 😊
More and more families are beginning to depend on air fryers for quick snacks and easy meal preparation. It’s easy to see why! They are so versatile! Kids love making stuff in air fryers, and this dough is perfect for making individual min pizzas!
Start with a hunk of dough a little bigger than a golf ball and flatten it out with your hands until it is about the size of an English muffin. Add sauce, topping, and cheese, and pop it in the air fryer at 400 degrees for about six minutes, or until the pizza is as browned as you like it.
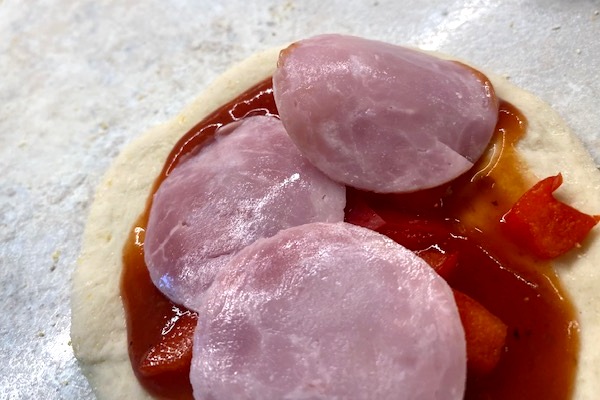
I used Canadian bacon and chopped red pepper on one and bacon and yellow peppers on another. My air fryer is fairly small, but two fit perfectly!
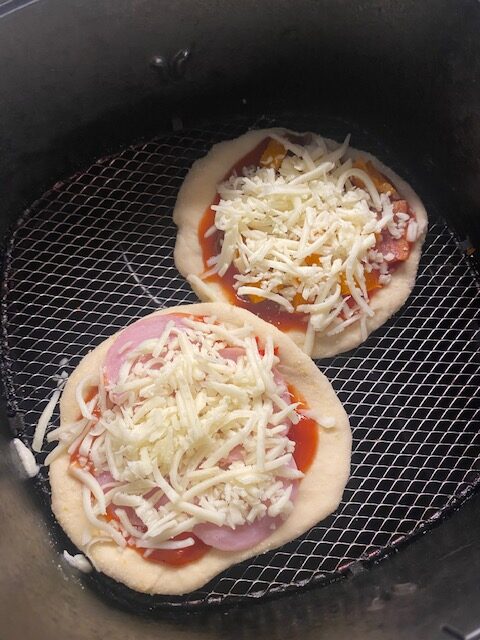
I had two perfect mini pizzas in about six minutes, which were plenty of lunch for me! So tasty!
Do you make homemade pizza, and if you do, have you ever tried to make the crust from scratch? It is so easy and so inexpensive; we hope you try it! What is the whackiest thing you ever ate on pizza? Anchovies? Sauerkraut? Fill us in! We’d be tickled to hear your stories!
MORE OF OUR TASTY FAMILY-FRIENDLY RECIPES
4 Reasons You Should Freeze Some Sweet Corn This Summer
How To Make The White BBQ Sauce That’s Fascinated Us Since 1925
German Sauerkraut Casserole With Bacon And Brown Sugar
If you like these recipes, you are our people! You can check some related articles below or search via categories on the right. B t, be warned; you will be on here for hours. E joy!
So, please share this recipe on your social media accounts like Facebook, Instagram, Twitter, and Pinterest. We would be honored and ever so grateful; thank you!