So Quick And Easy You Can Make Them One Jar At A Time
Crisp, crunchy, dilly pickled green beans don’t have to be just a sweet memory! They don’t take much time to make. You can whip out a quart jar while you clean up the kitchen after dinner, and the kitchen stays cool because these are refrigerator pickles. That means they remain crisp and fresh in the refrigerator, with no canning required.
Back in grandma’s day, pickling and canning was a hot, messy, whole-day process. True, she had a whole row of beautiful jars to show for her efforts, but today, we live at a much different pace. Still, we crave some of the goodies she made for us when we were growing up.
A Quick Quart Of Dilly Pickled Green Beans In Less Than 30 Minutes
Thankfully, there’s no shame in being “vegaholics” because Papa and I are a couple of them! If there were reward cards for shopping with my favorite produce guy, I’d be racking up points. Andy and his wife are open seven days a week from May to December, and most of the time, I hit Andrew’s Garden about three days a week.
We eat green beans three or four days a week all summer long. I buy the hand-picked beauties in half-pound bags. When I cook them, I snap off the stem end only because we love the look of whole green beans! Using my ancient stovetop pressure cooker, I can bring them to crisp-tender perfection in a flash. With just a drizzle of olive oil and a sprinkle of kosher salt, we are in a state of green bean bliss.
But I’ve been feeling adventurous about pickling and canning this summer, so I’ve been pulling up many old recipes to try. I thought it would be fun to turn some of these gorgeous green beans into pickled green beans, but I didn’t want to sign up for making a whole canner load. Luckily, this is a pickle that is quick and easy! These are my two favorite words in the kitchen!
About one pound of green beans makes a quart of dilly pickled green beans. I was a little picky about which beans I used, nothing too skinny or too plump, sort of the swimsuit competition in green bean selection. I wanted impressive-looking whole beans, so I snapped off only the stem ends, leaving the cute tip on the end for looks.
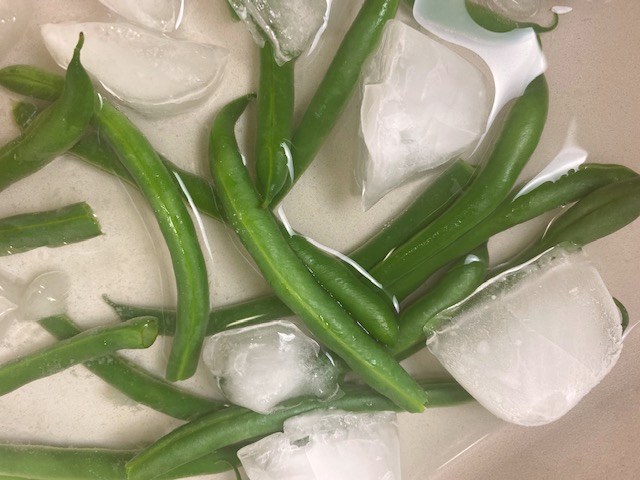
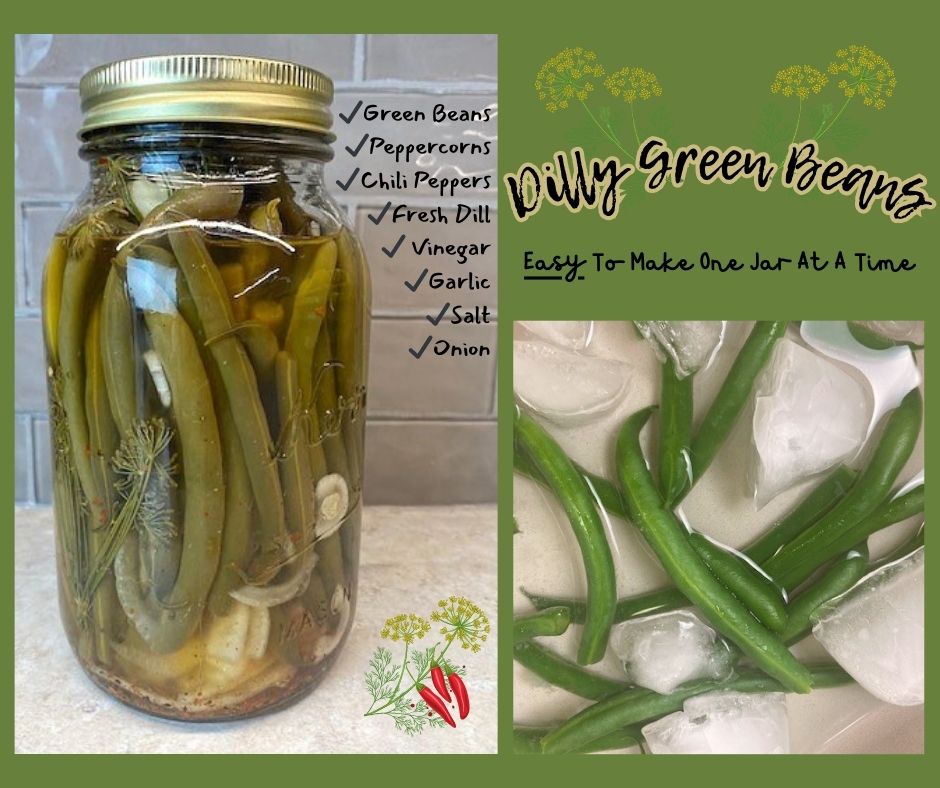
I put a pot of water on, and when it began to boil, I dropped the beans in for a quick blanching. As soon as the water resumes boiling, I set a one-minute timer. I took the pot off the stove, drained the water, and then plopped them into an icy bath to stop the cooking.
Take a look at those brilliant green beans! Blanching helps cook and tenderize the beans, kills bacteria, and stops the enzyme action. Chilling them immediately by plopping them in ice water eliminates any color change and leaves them crisp and gorgeous.
How To Make 1 Quart Of Pickled Green Beans
Start by making the brine. Combine both kinds of vinegar, sugar, salt, and garlic in a saucepan. Heat over medium heat and bring to a boil long enough to dissolve the sugar and salt when you are stirring. Set aside. It needs to cool to room temperature before you pour it over the beans.
You don’t need to sterilize the jar but do make sure it is squeaky clean. Put the red pepper flakes, peppercorns, and onions in the bottom of the jar. Next, begin stuffing green beans into the jar vertically. They need to be crowded in the jar tightly. I found it easier to lay the jar on its side and add beans one or two at a time. It’s a tight squeeze!
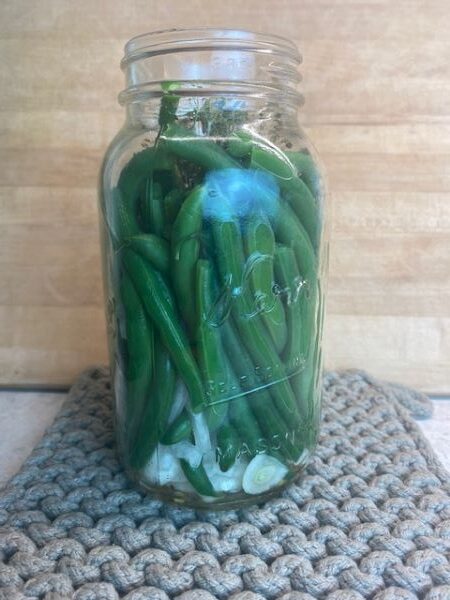
I rotated the jar as I went along and tapped it on the counter to tamp down the beans! Finally, all the beans were jarred! Tip: A regular mouth jar helps keep the beans corralled better than a wide-mouth jar! Who would have guessed? By the way, I was out of peppercorns when I made this recipe, so I substituted some fresh ground seasoned pepper.
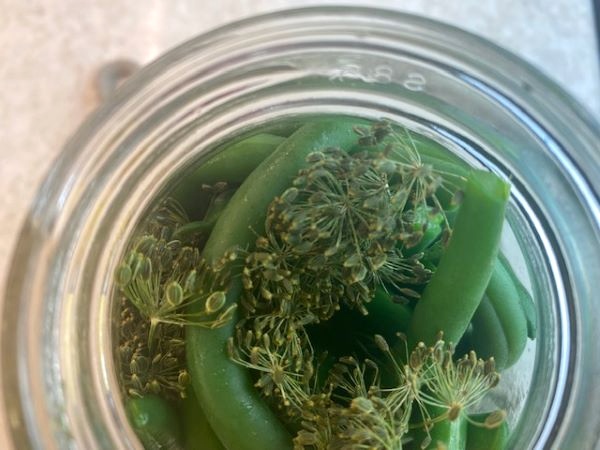
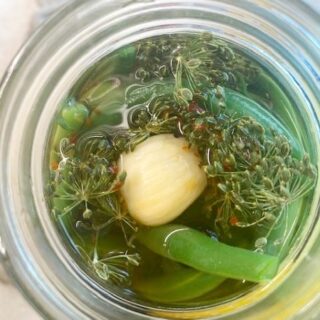
Finally, I stuffed in two heads of fresh dill. That’s the flower part of the dill plant. You can see all the little dill seeds on each head, and the smell is amazing! Stuff those heads of dill down among the beans. They obligingly fold up like little umbrellas so they fit snugly.
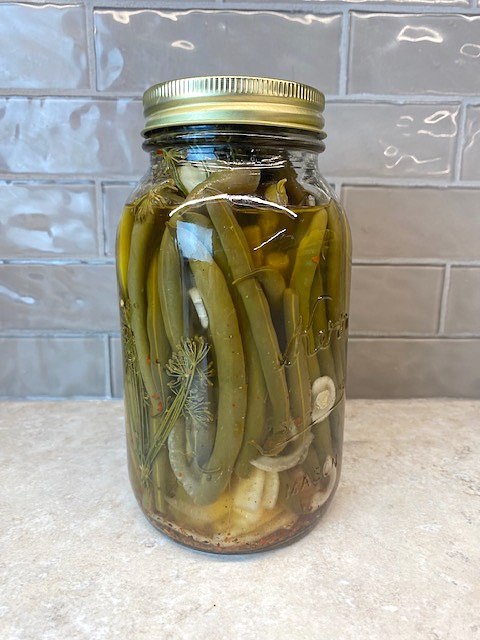
Finally, pour the brine over the contents of the jar. It should cover the beans completely but leave an inch or so of space between them and the lid. If you don’t have quite enough, add a little water. Now screw a lid firmly in place and let the jar sit on the counter for about 12 hours or overnight. After that, always keep the jar refrigerated.
The pickled green beans will keep in the refrigerator for three weeks or more! Use them on relish trays, chop them into salads or on top of burgers, or snack on them freely and without guilt right from the jar! They are your dilly pickled green beans!
Dilly Green Beans
Crisp, crunchy, refrigerator garlic dill green beans you can make a quart at a time. Quick and easy.
Ingredients
- 1 pound freshly picked, unblemished green beans
- 3/4 cup white vinegar
- 3/4 cup of apple cider vinegar
- 3/4 cup water
- 1-2 Tbsp sugar, to taste
- One clove of garlic, peeled
- 1 tsp kosher or pickling salt
- 1/3 cup onion, sliced thin or chopped
- 1/2 tsp peppercorns
- 2 heads of fresh dill
- 1/2 tsp pf red pepper flakes, or to taste
- 2 small chiles, optional
Instructions
- Make the brine by combining both kinds of vinegar, salt, sugar, peppercorns, and garlic.
- Bring to a boil just long enough to dissolve the sugar and the salt by stirring.
- Remove from heat and allow to cool to room temperature.
- Snap the stem end off the beans.
- Bring a pot of water to a boil.
- Put beans in boiling water and when it resumes boiling, set a timer for one minute.
- Remove beans from the heat, drain and put in an ice bath.
- Put dill, onion, peppercorns, and red pepper flakes in the jar,
- Stuff the green beans tightly in the jar, rotating and tapping the jar on the counter to tamp down the beans as needed.
- Pour the cooled brine over the beans, screw a lid tightly in place, leave on the counter for 12 hours.
- Refrigerate for up to 3 weeks; flavor intensifies as the beans marinate in the brine.
Do you have a favorite quick pickle recipe you’d like to share? We’d love to hear from you!
MORE OF OUR RECIPES


4 Reasons You Should Freeze Some Sweet Corn This Summer
How To Make The White BBQ Sauce That’s Fascinated Us Since 1925
German Sauerkraut Casserole With Bacon And Brown Sugar
If you like these recipes, you are our people! You can check some related articles below or search via categories on the right. But be warned; you will be on here for hours. Enjoy!
So, please share this recipe on your social media accounts like Facebook, Instagram, Twitter, and Pinterest. We would be honored and ever so grateful; thank you!

Pingback: How To Make Amazing Meyer Lemon Marmalade - yeyfood.com