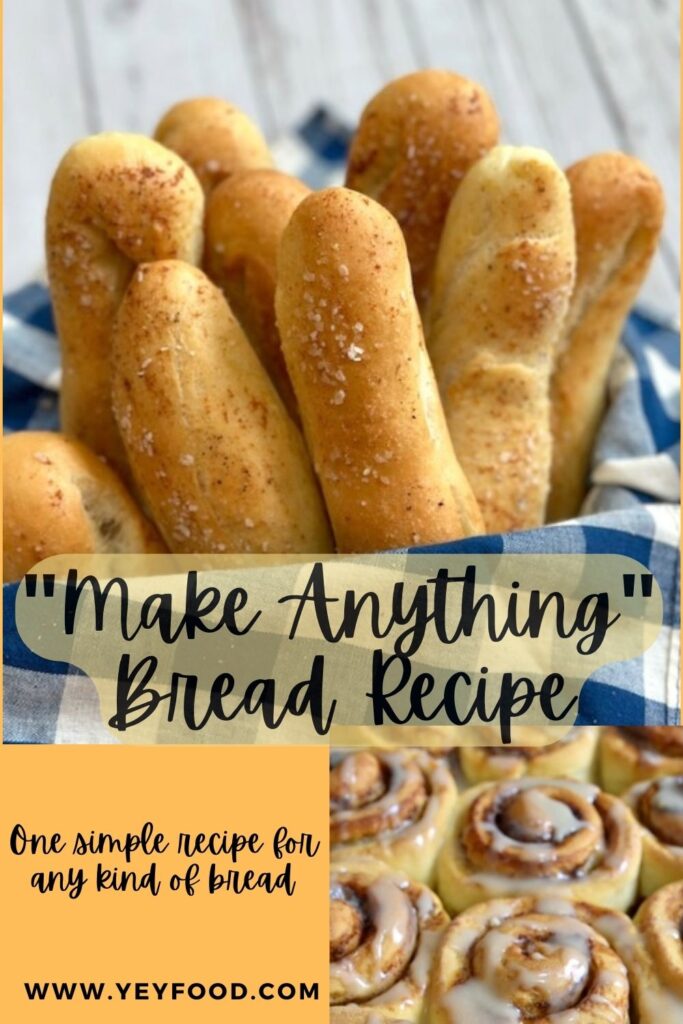
The “Make Anything” Yeast Bread Dough Recipe
Yeast bread does not need to be intimidating, and few things are more simple or less expensive. It does not take exceptional baking skills to make bread, dinner rolls, breadsticks, cinnamon rolls, or Runzas.
Once you get comfortable making yeast bread dough, you won’t need to measure the flour. The dough will tell you when it’s ready, and your hands will recognize when the dough feels just right. Bread baking can be and should be a very soothing, comforting process. Over the years, I have come to love King Arthur Flour, and I use it exclusively!
This “make anything” yeast bread recipe has only six ingredients, and all you need are water, flour, yeast, salt, sugar, and a little butter or oil. The ingredients are cheap, readily available, and can be stored easily. That means when you are learning, dumping a batch and starting over is not a loss to mourn. It’s part of the learning curve, that’s all.
Yeast Bread Starts With One Simple Rule
I am all about making yeast bread as simply as possible. That way, you’ll want to make it often and with confidence. You can read yourself crazy looking at all the well-meaning advice online, so today, let’s stay very basic.
The single most important rule for making yeast dough is to have the water at a temperature that’s not too hot or too cold. The ideal temperature for water is about 105 to 115 degrees Fahrenheit.
“The wrist test” is the next best thing to a thermometer. If the water feels comfy and warm, not too cool, or not too warm on your wrist, the yeast will probably like it, too. If you ever gave a baby her 3:00 AM feeding, you tested the temperature of the baby’s bottle the same way! Yeast and wee babies like the same temperature range!
There Are Two Types Of Yeast And Either One Will Work
Yeast bread needs warm water and a bit of sugar to activate. There are two kinds of yeast, regular and quick-rise yeast. I prefer to use rapid-rise or “instant” yeast because it saves a step, so it’s about 10 minutes faster. The primary difference is that rapid-rise yeast is processed, so it has finer granules, which means you can add it right along with the flour, water, and sugar with no need to “proof” it first.
If you have active dry yeast and not quick-rise yeast, I have never seen a more well-written article about how to proof yeast than this one. Read it, and you will know everything you need to know!
I bake yeast bread a lot, so I buy yeast in bulk. I store it in the freezer until I open it, then in a tightly sealed jar in the refrigerator. Yeast kept in the freezer lasts indefinitely. If you have old yeast packets stashed in a cupboard somewhere, check the expiration date before launching a batch of bread. If in doubt, proof it as described in the link above; if it flops, replace it.
The First Step Is Let’s Mix Up The Yeast Bread Dough
In your large stand mixer, make the dough. Option B: you can do this by hand and knead the dough. Feel virtuous, and build up your arm strength.
These days, I use my Kitchen Aid stand mixer to make bread or rolls because it does a great job of mixing and kneading the dough. For the first 30 years that I baked yeast bread, I mixed and kneaded the dough by hand. You can, too, but the mixer makes it faster and easier!
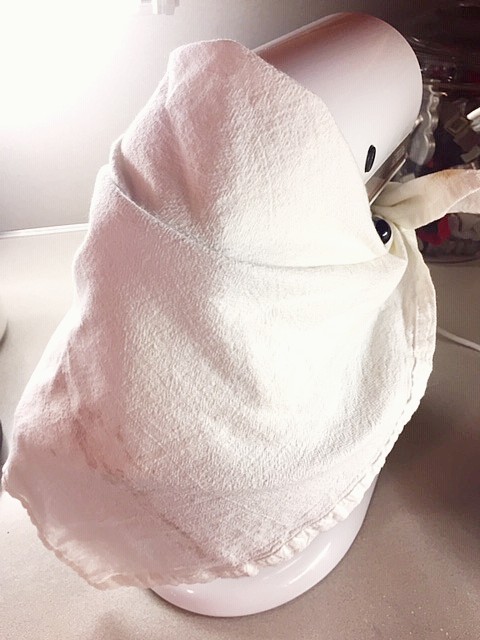
I have the best hint for making bread dough in a stand mixer: Drape the mixer head and bowl with a clean dishtowel when you add flour, and it saves a lot of mess and cleanup. My second best hint: Use a large clean paintbrush to sweep runaway flour off the mixer and counter into the trash or sink before you start the soap and water cleanup. Less pasty mess, less time. I admit it. I’m a little lazy.
Here is how you begin when you use instant yeast. (If you have active dry yeast, go back to the link above and read about proofing the yeast.)
Put warm water, yeast, sugar, salt, and butter in the mixer bowl and add a cup of flour. Using the whip attachment, mix thoroughly, scraping down the sides of the bowl occasionally.
Add 2 cups of flour, one at a time, and beat well. Keep the mixer draped for the next step.
Switch to the dough hook and add flour gradually until the hook starts pulling the dough away from the sides of the bowl. Stop the mixer from time to time and feel the dough. If it’s still sticky, add a tablespoon or so of flour at a time and resume kneading with the dough hook.
Stop adding flour when the dough is soft but handles without sticking to your fingers. Great bread dough should feel satiny and elastic. Remove the dough hook and gather the dough into a ball.
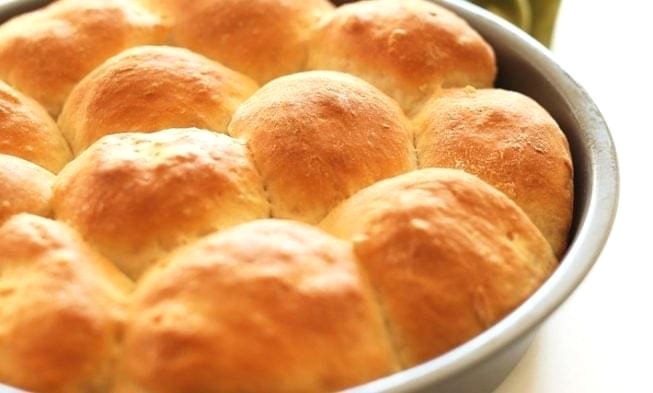
Oil or spray the bowl generously with non-stick spray and return the dough to the bowl. It’s not necessary to wash it before you do. Smooth a little cooking oil or olive oil over the dough, cover the bowl with a dish towel, and set it in a nice warm place to rise for about an hour. When the dough has doubled in size, shape it into whatever you want.
After shaping, the dough needs to rise again until it doubles in size, and this second rise will take less time.
Here Are Five Things You Can Make With This Bread Dough
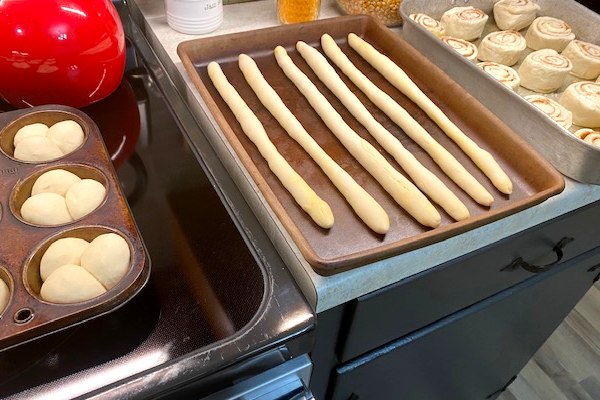
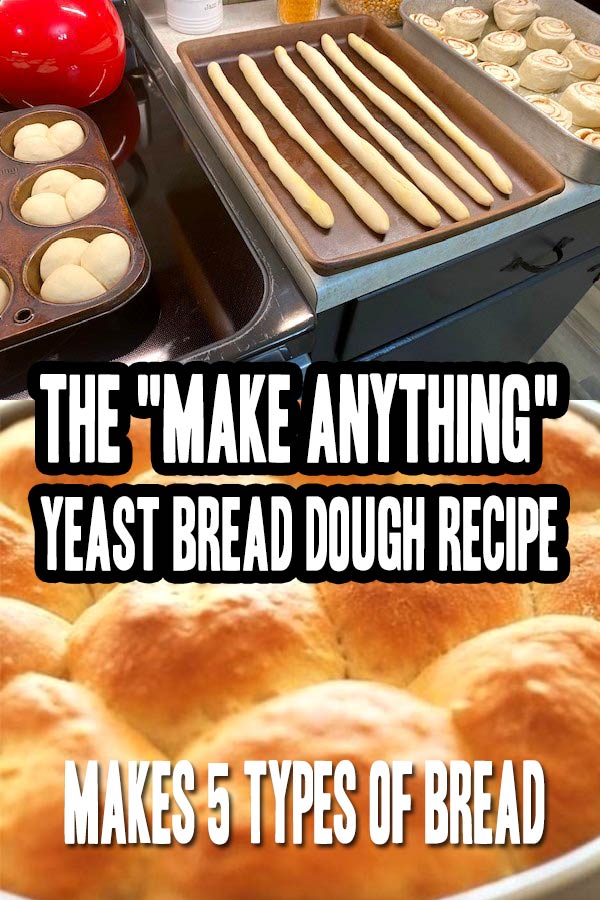
One batch of this basic “make anything” dough will make two dozen cinnamon rolls or dinner rolls. Or you can make 24 breadsticks or about 16 Runzas. It will also make two standard-size loaves of bread, so you have lots of options!
This picture was taken on a baking day at my house. Breadsticks have long been a favorite with our six grandkids. When they were little, the grandkids used breadsticks for swords, then ate them up!
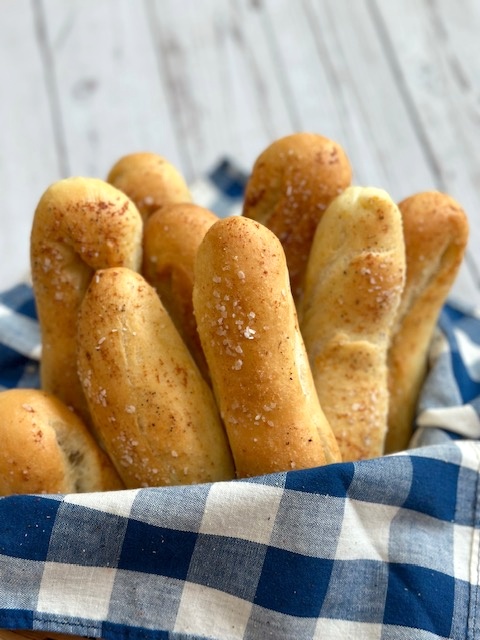
Brush the breadsticks with melted butter mixed with garlic powder before you bake them, and sprinkle them with kosher salt. When they come out of the oven, brush them with the garlic butter mixture again while they are still warm. The result? Breadsticks like the ones at Olive Garden. You will make them again and again!
The cloverleaf rolls are a little bit tedious to make but a favorite for all the folks who love tearing each one into three pieces, then adding lots of butter and jam.
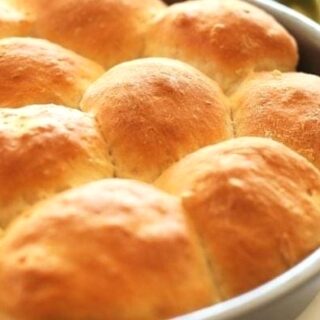
Plain pan rolls like in the top photo are great to serve with soup or salad. If you like, brush with melted butter, then sprinkle parmesan or herbs on top.
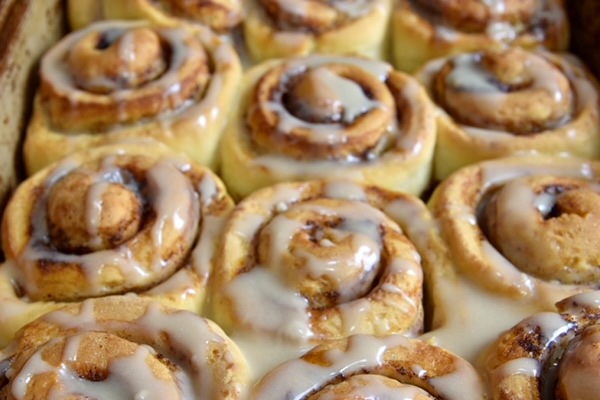
No Christmas at our house would be complete without at least two pans of cinnamon rolls with brown sugar glaze and a mountain of crisp bacon. And cinnamon rolls taste amazing with chili! It’s a very Nebraska thing to do, but don’t knock it until you’ve tried it!
Research Reveals Why The Smell of Bread Baking Evokes Strong Responses
There are few smells as pleasant as the aroma that wafts through a house when yeast bread is baking in the oven. But do you ever wonder why the smell of bread baking evokes such a unique response?
At the UCD (University College Dublin) Institute of Food and Health, Irish scientists studied the phenomenon and zeroed in on what people love about the distinctive aroma of bread.
The smell of bread baking is a powerful trigger because the olfactory bulb processes incoming odors. The olfactory starts inside the nose and runs along the bottom of the brain, where it has direct connections to two areas strongly associated with memory and emotion.
Bread features heavily in our childhood, which is why it evokes such strong memories, particularly of family, our early years, and comfort.
A survey of 1,000 people indicated that 89 percent of people said the smell of bread made them happy, and 63 percent reported it evoked positive memories.
Participants in the study, when asked to say a word which they associated with those memories, 29 percent identified the word “mum” or “mother” while one in five referenced the word “childhood.” Another 16 percent replied “home” or “grandparents.”
What thoughts float through your mind when you smell bread in the oven?
Printable Recipe:
Make Anything Yeast Dough Recipe
Use this simple, basic yeast dough to make dinner rolls, breadsticks, cinnamon rolls, bread, or runzas.
Ingredients
- 2 cups very warm water about 110 degrees, about the temperature of bathwater
- 5 tsp yeast or two packets
- 2 Tbsp butter softened
- 2 tsp salt
- 1/4 cup sugar
- 6 cups flour, approximately
- 2-3 Tbsp butter melted, to brush on finished bread
Instructions
Making The Dough
It is by far easier to make the dough with a stand mixer fitted with a dough hook. (But if you want arms like Jennifer Aniston, mixing and kneading the dough by hand might be your jam.)
- Put warm water, yeast, sugar, salt, and butter in the mixer bowl and add a cup of flour. Using the whip attachment, mix thoroughly, scraping down the sides of the bowl occasionally.
- Hint: grab a clean dish towel and wrap it around the bowl. That is unless you enjoy cleaning up flour. (I don't.)
- Add 2 cups of flour, one at a time, and beat well. Keep the mixer draped for the next step.
- Switch to a dough hook and add flour gradually until the hook starts pulling the dough away from the sides of the bowl.
- Stop the mixer and feel the dough. If it's still sticky, add a tablespoon or so of flour at a time and resume kneading with the dough hook.
- Stop adding flour when it's soft but handles without sticking to your fingers. Great bread dough should feel satiny and elastic.
- Remove the dough hook and gather the dough into a ball.
- Spray the bowl generously with non-stick spray and return the dough to the bowl. It's not necessary to wash it before you do.
- Smooth a little cooking oil or olive oil over the dough, cover the bowl with a dish towel and set it in a nice warm place to rise for about an hour. (In the summer, I've found my car makes a great place to raise dough quickly!)
- When the dough has doubled in size, shape it into whatever you want.
- The dough will need to rise again until doubled in size after shaping it. The second rise will be quicker than the first one.
- Bake in a 350-degree oven. The time in the oven depends on what you are making.
If you enjoyed this recipe, please share it on your social media! I would love for more people to try this delicious and easy-to-make recipe. If you have any questions or feedback, please feel free to leave a comment below. I would love to hear from you! Shhh… Join our secret foodie group on Facebook
More recipes from us
S’mores Bars How To Make Them Super Fast and Super Good
Danish Style Cucumber Salad
How To Make The White BBQ Sauce That’s Fascinated Us Since 1925
German Sauerkraut Casserole With Bacon And Brown Sugar