Best Butteriest Cinnamon Roll Recipe
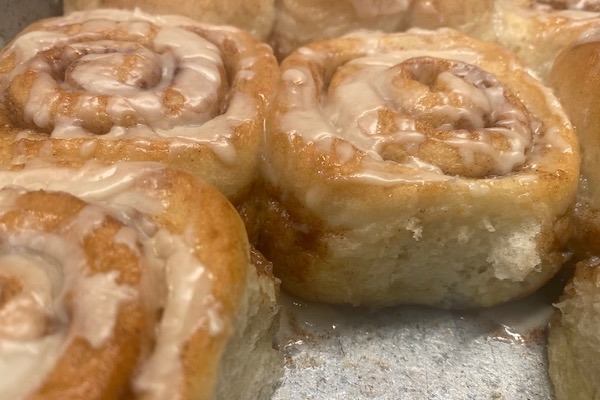
You can make the best, butteriest cinnamon rolls by using this very simple recipe. The ingredients are simple, too. You will need flour, water, salt, sugar, butter, and yeast for the dough, and butter, cinnamon, and sugar for the filling. For the glaze, you will need brown sugar, water, butter, and vanilla mixed with powdered sugar.
Cinnamon is one of the most cherished spices in the world. The distinctive aroma is unmistakable and always evokes warm memories of special times with our dearest people.
The art of making yeast bread is making a comeback, thank goodness. Nothing says welcome home, I love you, or good morning better than a fragrant pan of cinnamon rolls still warm from the oven, especially when the rolls are served with a smile and a mug of hot coffee or cocoa.
Let’s Make Two Dozen Of The Butteriest Cinnamon Rolls Ever
A stand mixer makes this very easy, and there is not much hands-on time needed. Yeast dough does not need to be intimidating at all, and with a little practice, your hands will tell you exactly when the dough is perfect. There is something very satisfying about working with yeast dough, and while the rolls are baking, the fragrance alone makes it all worthwhile.
The single most important rule for making yeast dough is to have the water at a temperature that’s not too hot or too cold. The ideal temperature for water is about 105 to 115 degrees Fahrenheit.
“The wrist test” is the next best thing to a thermometer. If you ever gave a baby her 3:00 AM feeding, you tested the temperature of the baby’s bottle the same way! Yeast and wee babies like the same temperature range! If the water feels comfy warm, not too cool, or not too warm on your wrist, the yeast will probably like it, too.
There Are Two Types Of Yeast And Either One Will Work
Yeast needs warm water and a bit of sugar to activate. There are two kinds of yeast, regular and quick-rise yeast. I prefer to use rapid-rise or “instant” yeast because it saves a step, so it’s about 10 minutes faster. The primary difference is that rapid-rise yeast is processed, so it has finer granules, which means you can add it right along with the flour, water, and sugar without needing to “proof” it first.
If you have active dry yeast and not quick-rise yeast, I have never seen a more well-written article about how to proof yeast than this one. Read it, and you will know everything you need to know!
I bake yeast bread a lot, so I buy yeast in bulk. I store it in the freezer until I open it, then in a tightly sealed jar in the refrigerator. Yeast kept in the freezer lasts indefinitely. If you have old yeast packets stashed in a cupboard somewhere, check the expiration date before launching a batch of bread. If in doubt, proof it as described in the link above; if it flops, replace it.
The First Step Is Let’s Mix Up The Dough
In your large stand mixer, make the dough. Option B: you can do this by hand and knead the dough. Feel virtuous, and build up your arm strength.
For the first 30 years I baked yeast bread; I mixed and kneaded the dough by hand. These days, I use a stand mixer to make bread or rolls because it does a great job of mixing and kneading the dough. You can, too, but the mixer makes it faster and easier!
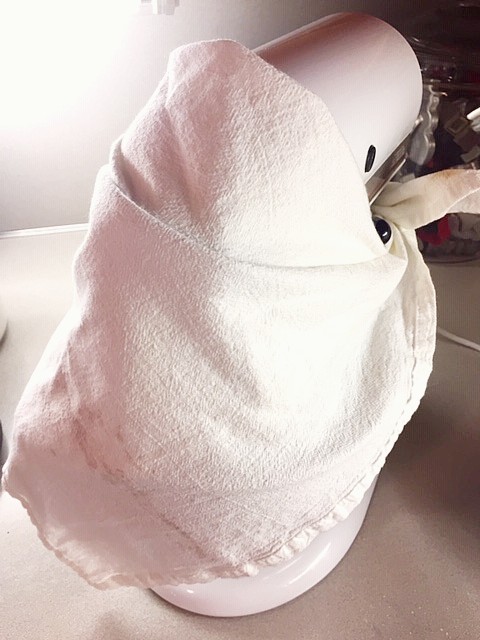
I have the best hint for making bread dough in a stand mixer: Drape the mixer head and bowl with a clean dishtowel when you add flour, which saves a lot of mess and cleanup. My second best hint: Use a large clean paintbrush to sweep runaway flour off the mixer and counter into the trash or sink before starting the soap and water cleanup. Less pasty mess, less time. I admit it. I’m a little lazy.
I have another hint, use bread flour. I highly recommend King Arthur Bread flour (not sponsored) for its quality and high gluten content. I was late to the party on this discovery, but all flour is not equal. 😉
Put the warm water, yeast, sugar, salt, and butter in the mixer bowl and add a cup of flour. Use the whip attachment to mix the ingredients thoroughly, scraping down the sides of the bowl occasionally. Add another cup of flour and continue using the whip attachment.
Switch to a dough hook and add the remaining flour gradually until the hook pulls the dough away from the sides of the bowl. Stop the mixer and feel the dough.
If it’s still sticky, add a tablespoon or so of flour at a time and resume kneading with the dough hook. Humidity, temperature, and moisture content in the flour vary, which is why an exact amount of flour is impossible to predict.
Remove the dough hook and gather the dough into a ball. Stop adding flour when the dough is soft but handles without sticking to your fingers. Great bread dough should feel satiny and elastic.
Smooth a little cooking oil or olive oil over the dough, cover the bowl with a dish towel, and set it in a nice warm place to rise for about an hour, or until the dough has doubled in size. Spray the bowl generously with non-stick spray and return the dough to the bowl. It’s not necessary to wash the bowl before you do.
Now We’re Ready To Make Dough Into The Butteriest Cinnamon Rolls
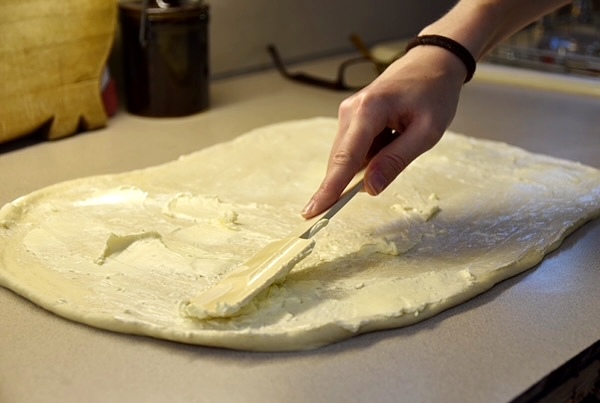
Divide the ball of dough in half. Roll half of the dough into a rectangle that is about ten by 15 inches in size. Spread one whole stick of softened butter on each rectangle of dough. Now sprinkle about a cup of cinnamon sugar evenly over the butter. Roll, starting with a long side, into a log. Pat the ends and use your hands to even up the dough.
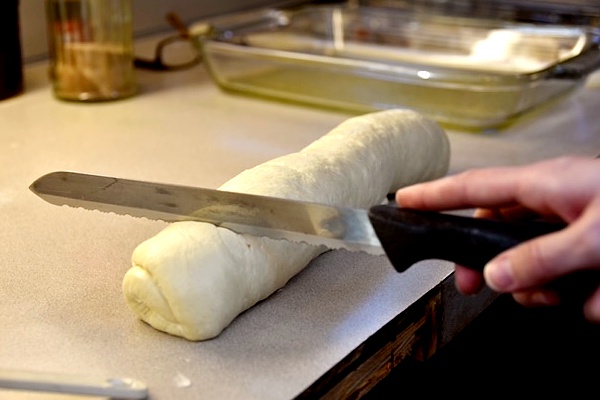
Now use a serrated knife to slice the log into twelve equal-size slices of dough and arrange them evenly in a 13″ by 9″ baking pan. Set the pan aside and repeat with the rest of the dough. Cover the pans with a dish towel and set them aside to rise until they are double. This second rise will take less time.
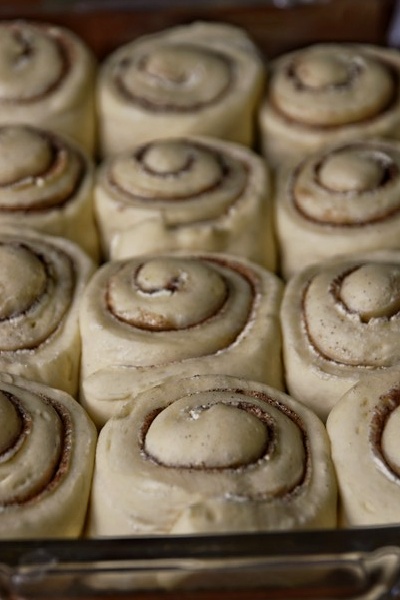
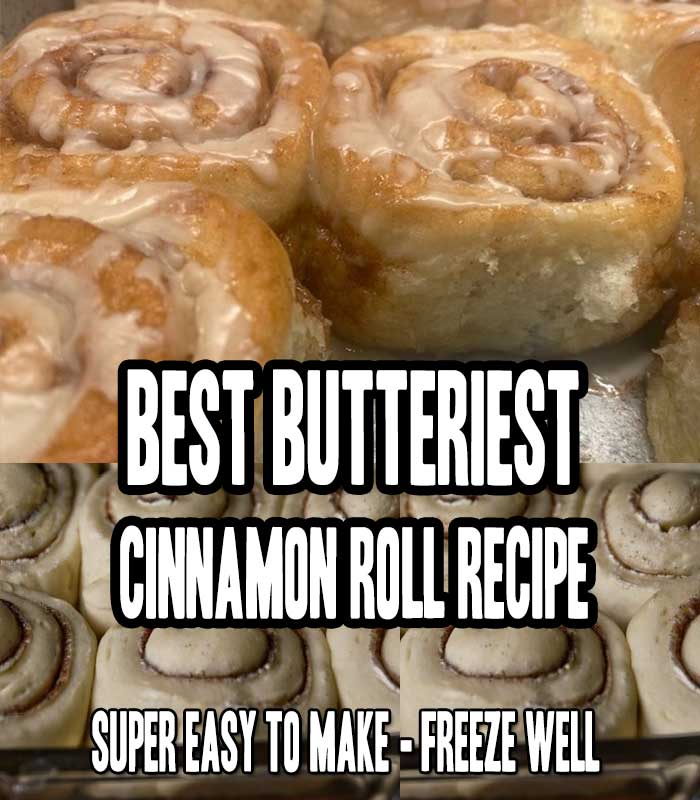
Here is how they will look when they are ready for the oven. The sides will barely touch and get a little larger as they bake.
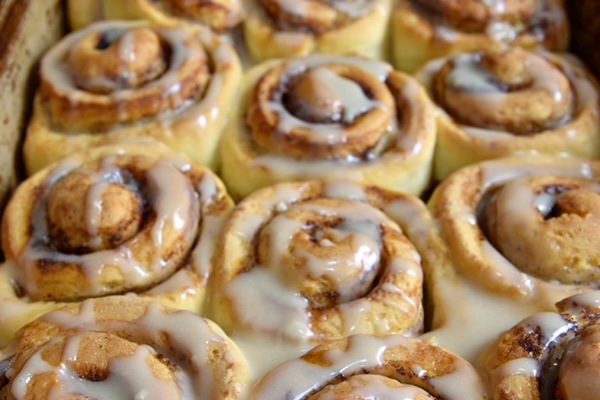
Bake at 350 degrees for about 25 minutes or until lightly browned. They should sound hollow when you tap them with a spoon. The butteriest cinnamon rolls will look like this.
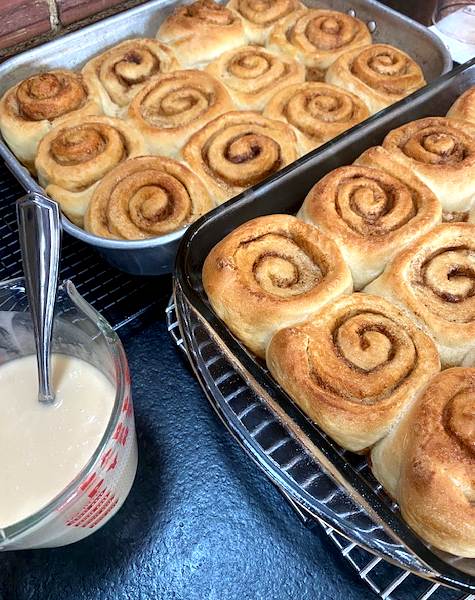
While the rolls are baking, make the glaze. Dissolve 1/4 cup of brown sugar in about 1/2 cup of very hot water, then add two tablespoons of butter, let it melt, and stir in a teaspoon of vanilla. Beat in about 2 cups of powdered sugar. If it is too thick and won’t drizzle from a spoon, add a bit more water or milk (sometimes I use cream.) If it’s too thin, add a little more powdered sugar.
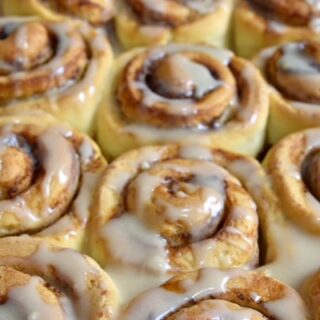
I like to put the icing in a measuring cup with a lip so I can drizzle it evenly over the rolls after they have cooled a bit. It is important to let the rolls cool before you add the icing. If you don’t, the icing will melt into the rolls.
I have family members who want LOTS of icing on their butteriest cinnamon rolls, so sometimes I make a double batch. If you have any leftovers, they taste wonderful between graham crackers, vanilla wafers, or on a spoon!
Aren’t the butteriest cinnamon rolls yummy-looking? They go great with my family’s favorite chili, by the way! We also love crisp bacon with cinnamon rolls! Here’s how to make perfect bacon every time!
Butteriest Cinnamon Rolls
Here is a recipe for wonderful homemade cinnamon rolls with a buttery light brown sugar glaze.
Ingredients
- DOUGH
- 2 cups of very warm water, about 110 degrees, about the temperature of bathwater
- 5 tsp yeast or two packets
- 2 Tbsp butter softened
- 2 tsp salt
- 1/4 cup sugar
- 6 cups bread flour, approximately
- FILLING
- 2 sticks of butter, softened to room temperature
- 2 cups granulated sugar
- 2 Tbsp cinnamon, or more to taste
- GLAZE/ICING
- 1/2 cup very hot water
- 1/4 cup brown sugar
- 2 tbsp butter
- 1 tsp vanilla
- 2 cups of powdered sugar, plus more if needed
Instructions
- Put warm water, yeast, sugar, salt, and butter in the mixer bowl and add a cup of flour. Using the whip attachment, mix thoroughly, scraping down the sides of the bowl occasionally.
- That is unless you enjoy cleaning up flour. (I don't.) Hint: grab a clean dish towel and wrap it around the bowl.
- Add 2 cups of flour, one at a time, and beat well. Keep the mixer draped for the next step.
- Switch to a dough hook and add flour gradually until the hook starts to pull the dough away from the sides of the bowl.
- Stop the mixer and feel the dough. If it's still sticky, add a tablespoon or so of flour at a time and resume kneading with the dough hook.
- Stop adding flour when it's soft, but you can handle it without sticking to your fingers. Great bread dough should feel satiny and elastic.
- Remove the dough hook and gather the dough into a ball.
- Spray the bowl generously with non-stick spray and return the dough to the bowl. It's not necessary to wash it before you do.
- Smooth a little cooking oil or olive oil over the dough, cover the bowl with a dish towel and set it in a nice warm place to rise for about an hour until doubled in size.
- Divide the dough into two balls.
- Roll the dough into a rectangle approximately 15" by 10".
- Spread one whole stick of butter on the dough.
- Mix cinnamon and sugar in a shaker or bowl.
- Sprinkle about one cup of cinnamon sugar over the butter.
- Start with the long end and roll the dough tightly into a log. Use your hands to even up the roll and pat the ends in place.
- Use a serrated knife to cut the log into 12 equal slices.
- Put the slices into a greased 9" by 13" baking pan.
- Repeat with the second ball of dough.
- Cover the pans with a dish towel and set them aside to rise until they double in size.
- Bake at 350 degrees for about 25 minutes or until lightly browned. They should sound hollow when you tap them with a spoon.
- Make the glaze while the rolls bake.
- Dissolve 1/4 cup of brown sugar in about 1/2 cup of very hot water.
- Add two tablespoons of butter, let it melt, and stir in a teaspoon of vanilla.
- Beat in about 2 cups of powdered sugar. If it is too thick and won't drizzle from a spoon, add a bit more water or milk (sometimes I use cream.) If it's too thin, add a little more powdered sugar.
- Allow the rolls to cool before drizzling icing over them.
Notes
I HIGHLY recommend King Arthur bread flour for its quality and high gluten content. You can make good rolls with all-purpose flour, just not AS good! 😉
Research Reveals Why The Smell of Bread Baking Evokes Strong Responses
There are few smells as pleasant as the aroma that wafts through a house when yeast bread is baking in the oven. But do you ever wonder why the smell of bread baking evokes such a unique response?
At the UCD (University College Dublin) Institute of Food and Health, Irish scientists studied the phenomenon and zeroed in on what people love about the distinctive aroma of bread.
The smell of bread baking is a powerful trigger because the olfactory bulb processes incoming odors. The olfactory starts inside the nose and runs along the bottom of the brain, where it has direct connections to two areas strongly associated with memory and emotion.
Bread features heavily in our childhood, which is why it evokes strong memories, particularly of family, our early years, and comfort.
A survey of 1,000 people indicated that 89 percent of people said the smell of bread made them happy, and 63 percent reported it evoked positive memories.
Participants in the study, when asked to say a word that they associated with those memories, 29 percent identified the word “mum” or “mother,” while one in five referenced the word “childhood.” Another 16 percent replied “home” or “grandparents.”
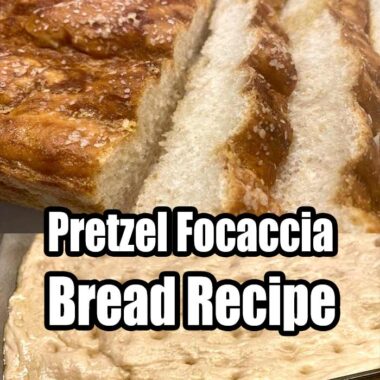
What thoughts float through your mind when you smell bread in the oven? Do you make yeast bread? Here are some other of our favorite yeast bread recipes. Pretzel Focaccia bread, Sixty minute French Bread, Dilly Bread, Dutch Oven Bread. Do you have a favorite?
MORE OF OUR POPULAR FAMILY-FRIENDLY RECIPES
The Number 1 Practically Perfect Poppy Seed Bread
Oven-Baked Steak With Brown Gravy
If you like these recipes, you are our people! You can check some related articles below or search via categories on the right. But, be warned; you will be on here for hours. Enjoy!



I can’t wait to try this out, it looks absolutely wonderful! The picture says they freeze well, so if I only want half a batch at what point should they be put in the freezer, and what is the best way to freeze them?
where are the baking instructions for this recipe?
In the post: Bake at 350 degrees for about 25 minutes or until lightly browned. They should sound hollow when you tap them with a spoon.
On the recipe card: Bake at 350 degrees for about 25 minutes or until lightly browned. They should sound hollow when you tap them with a spoon.
Made these they were easy to make and tasted wonderful….
Where is the recipe for the Runzas?
You can find it by typing Runza into the search bar on the home page of yeyfood, but here you go, my friend! https://yeyfood.com/how-to-make-authentic-runzas-right-in-your-very-own-kitchen/
Pingback: Fast And Easy 6 Ingredient Cinnamon Cheesecake Bars - yeyfood.com
Pingback: Yeyfood.com: Recipes, cooking tips, and kitchen hacks for home cooks of all levels