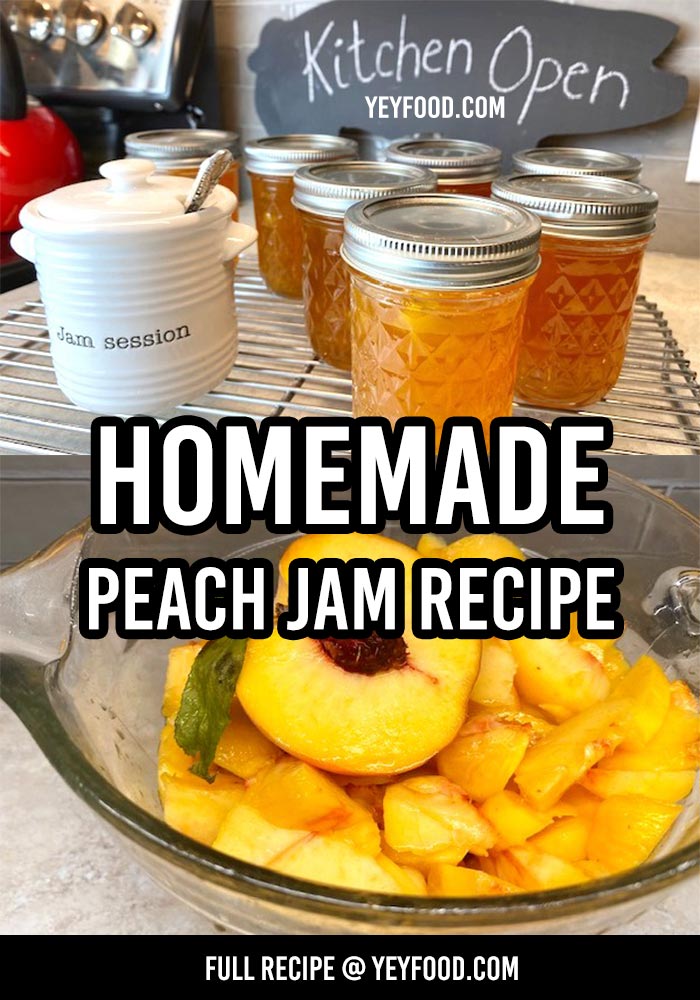
Homemade Peach Jam Recipe
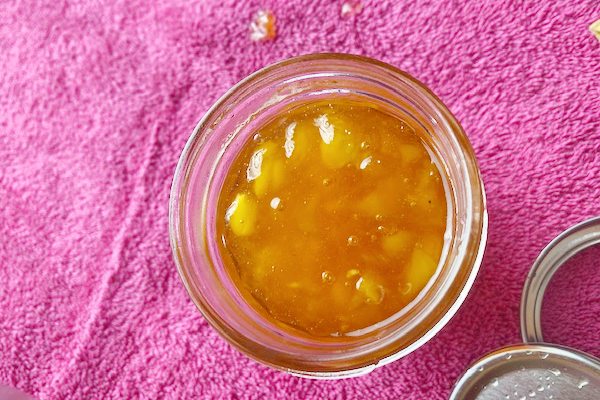
Fresh peaches are one of the summer’s most generous gifts. When you make peach jam, you literally capture some of the sunshine that ripened the delicious fruit. Peach jam is the most glorious golden color, and homemade peach jam’s flavor brings magic to a simple piece of toast or biscuit.
I bought a “lug” of peaches this week. Agriculture is full of endearing words like that. A lug is less than a half bushel; if you are talking about peaches, it weighs between nineteen and twenty-two pounds.
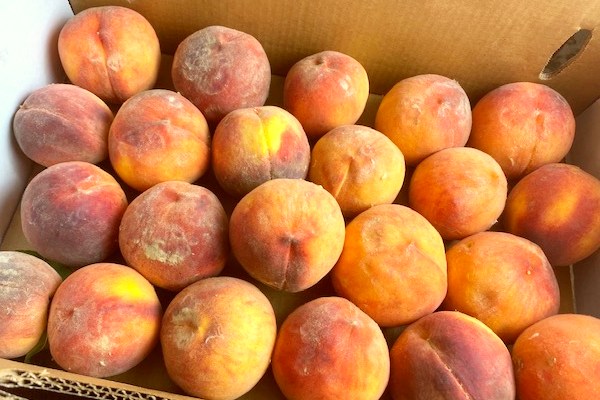
My peaches came from Colorado, and they are beauties. Colorado peaches are most famously grown in the town of Palisade, Colorado. They are renowned for being extra juicy and extra sweet because of the long sunny days and cool summer nights in Colorado that help all those delicious fruity sugars develop so intensely.
If you have a heart for agriculture and farmers, you will love this article about the rich tradition and history of Palisade peaches. Fruit farming is not for the faint-hearted.
What will I do with twenty-two pounds of peaches when our household consists of just two senior citizens? I will eat one or two fresh peaches with the juice dripping down my chin every day; I will make a least one decadent dessert with them; I will freeze enough for some pies and crisps this winter, and I will make at least one or two batches of gloriously golden peach jam.
HOW TO COOK UP A SUNNY BATCH OF HOMEMADE PEACH JAM
Before you begin, fill one soup pot about halfway full of water. Add two tablespoons of vinegar if you have hard water. Put it on the stove and turn on the burner so it will come to a boil while you make the jam.
You will use this water bath to process the jam and make it shelf stable so you can use it or give it away to some lucky people all winter long.
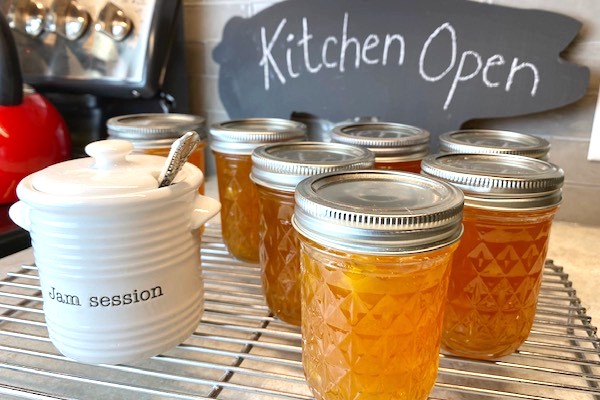
HERE’S WHAT YOU NEED TO GET READY FOR YOUR JAM SESSION
When my daughters and I make jam, jelly, or marmalade, we call have come to call them “jam sessions.” I want you to have as much fun as we do making, eating, and giving away these coveted canned goods!
It’s easy to make jam and a pretty smooth process once you’ve done it a time or two. However, once you are in the middle of a batch of jam, it’s almost impossible to stop and make a mad dash to town, so I advise that you assemble everything you need and take the time to read through the recipe and the instructions before you begin.
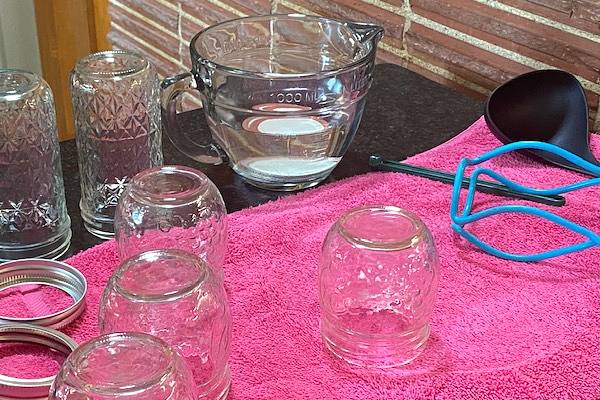
Set up a little assembly line with everything you need close at hand. Once you’ve started, you won’t have time to run to the store! Here’s a list of equipment you’ll need. Those are my supplies, and that’s my lovely canning towel. Probably a graduation gift from long ago. I keep it stashed in a handy drawer on my island where we conduct our jam sessions!
- Two tall soup pots or a tall soup pot and a water bath canner (one for cooking jam, one for processing the jars)
- Clean jelly jars you’ve washed in very hot, soapy water and rinsed thoroughly or washed in the dishwasher.
- Measuring cups and measuring spoons
- A masher or chopper
- A large measuring cup or bowl for sugar
- Canning flats and rings
- A ladle for putting the jam into the jars
- A canning funnel
- Tongs or a magnetic lid lifter to pick up flats from the hot water
- A clean damp dishcloth to wipe off jar rims before applying the lids
- A jar lifter to move filled in and out of the boiling water bath
- A thick old towel
- A cooling rack
Bear in mind that my canning tools are old and have seen many years of use, but you can still find them all, they won’t cost a lot, and yours will last for years, too! I can’t tell you how many times I find a use for each piece, even when I’m not canning!
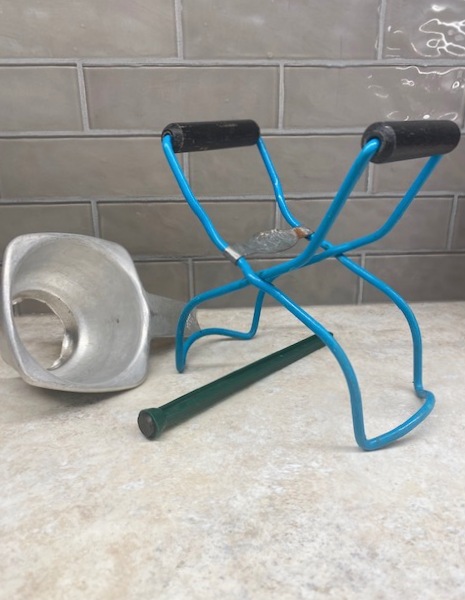
What you see here is an old aluminum canning funnel. I think the new ones are plastic these days, a jar lifter (the blue thing), and a magnetic lid lifter. The last little item was a gift from my sister and niece after watching me burn my fingers without one!
Everything you’ll need is readily available at grocery stores, hardware stores, online, and even Walmart. The things you’ll need are inexpensive and last a long time. And believe me, you’ll find lots of uses for jars, jar lifters, and canning funnels beyond making jam!
Let’s Start Jammin’ With These Gorgeous Peaches
Measure six cups of sugar into a large measuring cup and set it aside. Don’t forget to measure the sugar in advance because when it’s time to add it, you must add it all at once!
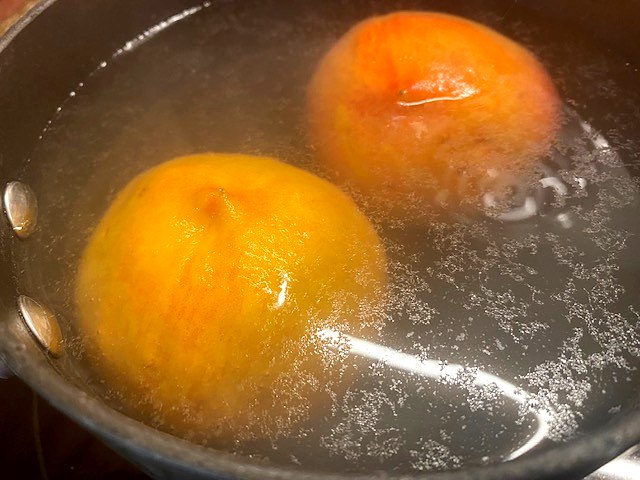
Blanch the peaches briefly in a boiling water bath; it only takes a minute or two. Remove the peach from the boiling water and place it into a bowl or sink full of very cold water. When you remove the peach from the cold water, the skin peels off easily with a paring knife.
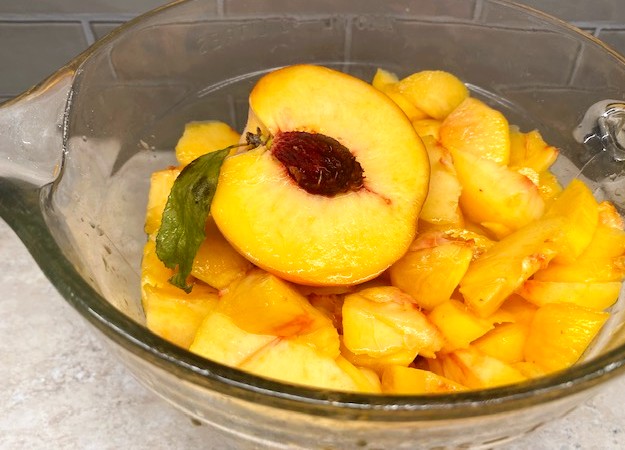
Next, cut the peach in half, starting at the stem end. Then twist the peach halves in opposite directions to expose the pit and remove it. Chop the peaches and measure six cups of peaches. Put them into a tall stockpot and place the pot on the stove set to medium heat.
When the peaches are all nice and warm, add a box of pectin, a pat of butter, and three tablespoons of lemon juice. The butter stops foam from forming on top of the jam. The tart taste of lemon keeps the peach jam from becoming overly sweet.
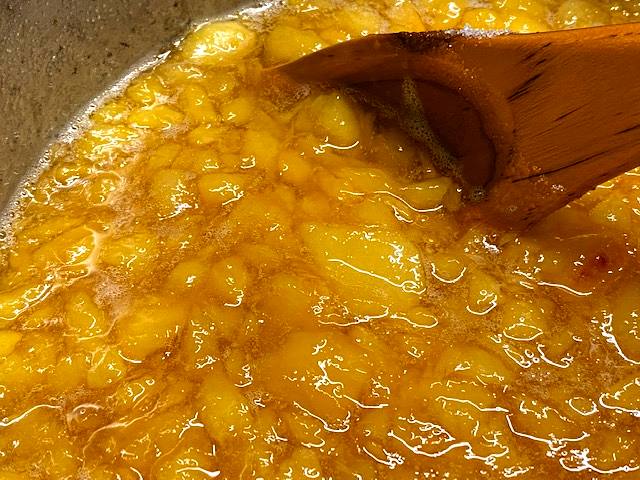
Bring this mixture to a boil. Next, add the sugar all at once. Yes, you’re right. That’s a lot of sugar. Don’t mess with the quantity. Continue boiling this mixture, stirring constantly. The sugar and fruit will get dangerously hot, so please use a long spoon to stir the jam as it cooks.
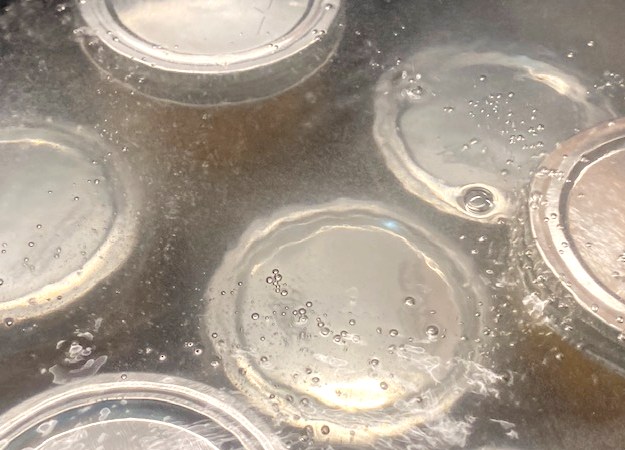
Stop now and put your canning lids into a heat-proof bowl or glass measuring cup. Cover them with boiling water so they will be ready to use.
When the jam is boiling so hard you cannot stir it down, start a timer you have set for exactly one minute. Keep cooking and stirring until the timer goes off, then remove the pot from the stove.
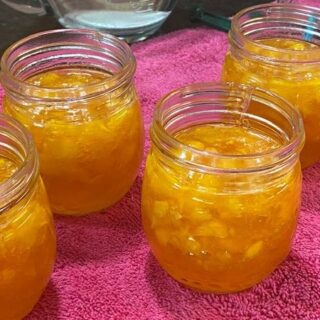
Place the canning funnel into a jar and use the ladle to fill it. Remember to leave a half-inch clearance. Now, move the ladle into the next empty jar. The towel you laid on the counter will catch all the drips!
Use a damp cloth to wipe the rim and cover each jar with a two-piece lid. Screw the bands in place by hand tightly. Place the jars on an elevated rack in the canner. (Water must cover jars by 1 to 2 inches; add boiling water, if necessary.) Lower the rack into the canner.
Cover and bring the water to a gentle boil and process for ten minutes. Use a canning jar lifter to remove the jars of peach jam from the canner and place them upright on a thick towel or a rack to cool completely.
Please do not touch the jars until they are completely cool. After the jars cool, check the seals by pressing the center of the lid with your finger. (If tops spring back, lids are not sealed, refrigerate the jam and use it within three or four weeks.)
Fresh Peach Jam
Ingredients
- 6 cups of fresh peaches, peeled and chopped
- One 1.75-ounce box of pectin
- 6 cups of sugar
- 1 Tbsp of butter
- 3 Tbsp of lemon juice
Instructions
- Assemble all your supplies as listed in the post.
- Fill a tall soup pot or water bath canner about halfway full of water. If you have hard water, add two tablespoons of vinegar and put it on the stove to boil.
- Measure the sugar exactly and put it in a bowl. I love using a batter bowl with a pouring spout.
- Put the peaches in a tall soup pot. Turn on low heat.
- Chop the peaches as they cook until the chunks are pea-sized. You can also puree the peaches in a food processor before cooking for a smoother texture.
- Bring to a boil and add pectin, butter, and lemon juice. Stir and cook for five to ten minutes.
- Set a one-minute timer, so you are ready for the next step.
- Add the sugar all at once and constantly stir. As it cooks, scrape the sugar down from the sides of the pot. Keep cooking until the boil is so vigorous that you cannot stir it down.
- Start the timer and cook the jam for precisely one minute.
- Remove the pot from heat.
- Ladle the hot jam into a jar; wipe the rim of the jar with a damp dishcloth.
- Put a lid on the jar, and make sure it sits level and flat.
- Screw a canning ring in place to secure the lid and hand-tighten.
- Put the jar in the water bath.
- Repeat with the rest of the jars until you have used all the jam.
- It is ok to mix sizes of jars if you don't have enough to fill a large one.
- Process jars in the hot water bath for ten minutes.
- Remove each jar from the water bath with the jar lifter and set it gently on a cooling rack.
- Please do not touch the jars until they are completely cool.
- If jars do not seal, refrigerate and use them within three weeks or so.
Notes
You can also use two 16-ounce bags of frozen peaches, Defrost, and continue as described in the instructions.
Nutrition Information:
Yield: 48 Serving Size: 1Amount Per Serving: Calories: 112Total Fat: 0gSaturated Fat: 0gTrans Fat: 0gUnsaturated Fat: 0gCholesterol: 1mgSodium: 6mgCarbohydrates: 28gFiber: 0gSugar: 27gProtein: 0g
Here in Nebraska, we are getting wonderful Colorado peaches now, but the season will soon be over! Here are some of our other favorite peach recipes to enjoy while we can! Iron Skillet Peach Crisp, Four-Ingredient Peach Cobbler, Peach Bread, Fresh Peach Pie. And here’s how to freeze peaches without sugar so you won’t need to adjust the recipes!
MORE OF OUR QUICK AND EASY FAMILY-STYLE RECIPES:

The Ultimate Bread and Butter Pickle Recipe
The Number 1 Practically Perfect Poppy Seed Bread
Oven-Baked Steak With Brown Gravy
Delicious Puff Pastry Appetizer With Cheese And Garlic
If you like these recipes, you are our people! You can check some related articles below or search via categories on the right. But, be warned; you will be on here for hours. Enjoy!

Pingback: Make This Jalapeno Jelly For The Best Sweet Heat - yeyfood.com
Pingback: Yeyfood.com: Recipes, cooking tips, and kitchen hacks for home cooks of all levels